

Level-up your flower photography
Dramatically improve the quality of your photography with a few simple techniques

As I’ve discovered on Instagram, my followers really appreciate good photography. In a world of brevity and a billion images round every corner, quality still matters. Your followers are interested in what you show them and, to a limited extent, living vicariously through your lens and the snapshots of a world that you choose to reveal. Quality images and video can only help improve their experience when followers land on your grid or read through your blog.
As a professional wildlife photographer I’ve spent years studying, developing and deepening my appreciation of natural beauty. To some extent, looking for perfection too, or as near as I can find. Alongside the photography, I authored dozens of “how to photograph…” guides for photography magazines. So, the thought occurred to me that (although I’m very much a gardener these days) I could share a few simple pointers to improve your own garden photography.
Note: This particular post is all about photographing plants and flowers and I’m cautiously assuming that most readers will be using a smartphone camera.
A quality start
These days the vast majority of images are seen online, on social media, on smartphones and tablets. Small screens. But, exacting standards are still a bonus if you really care about the quality of image you’re posting.
Although I have ‘relaxed' my standards somewhat, if I’m making the effort to photograph a flower, I will always start with quality and you should too. Start by selecting the most perfect specimen you can find. Always be meticulous. Be fastidious! Embrace your fussiness!! Any flowers with damage to petals or withering blooms are not worth the effort. Trust me!
If there’s a hole in a petal, brown leaves, or that bloom has ‘gone over’ it will distract the viewer and detract from the beauty and I want you to be proud of your photos! Of course, if you’re photographing seed-heads and dry stems, then a little damage is to be expected - wear and tear and silky webs add to the value. Same for photographing pollinators, or other invertebrates resting or feeding on the plant because they become the focal point, not the glorious flower.
Into the garden
When you’re heading out into your garden, camera(phone) in hand, just take a few minutes to see which plants are looking their absolute best - whether its bud, bloom, seed-head, or leaf. Take a few canes with you, or some brightly coloured string, so you can mark the best specimens and come back to them later.
If you’re looking to improve your photography, great! Practice really does make perfect, so treat each outing as a mini photo essay. Allow yourself the pleasure of a few hour’s photography and you’ll have enough images to feed your socials for a week.
Start-off with the plant in context - include your garden and surroundings. All too often I see a (social media) grid of close-up frame-filling blooms which tells me very little about the plant, nothing about the garden or the gardener. There’s no interest, engagement, or story and I always scroll by, as will so many others.
Obviously, the context image doesn’t have to be the only shot you post. It could be just one of several in a reel slideshow, or the second image in a carousel or story post. But do try to tell us where you are (within reason) and where this plant is growing, without using words.
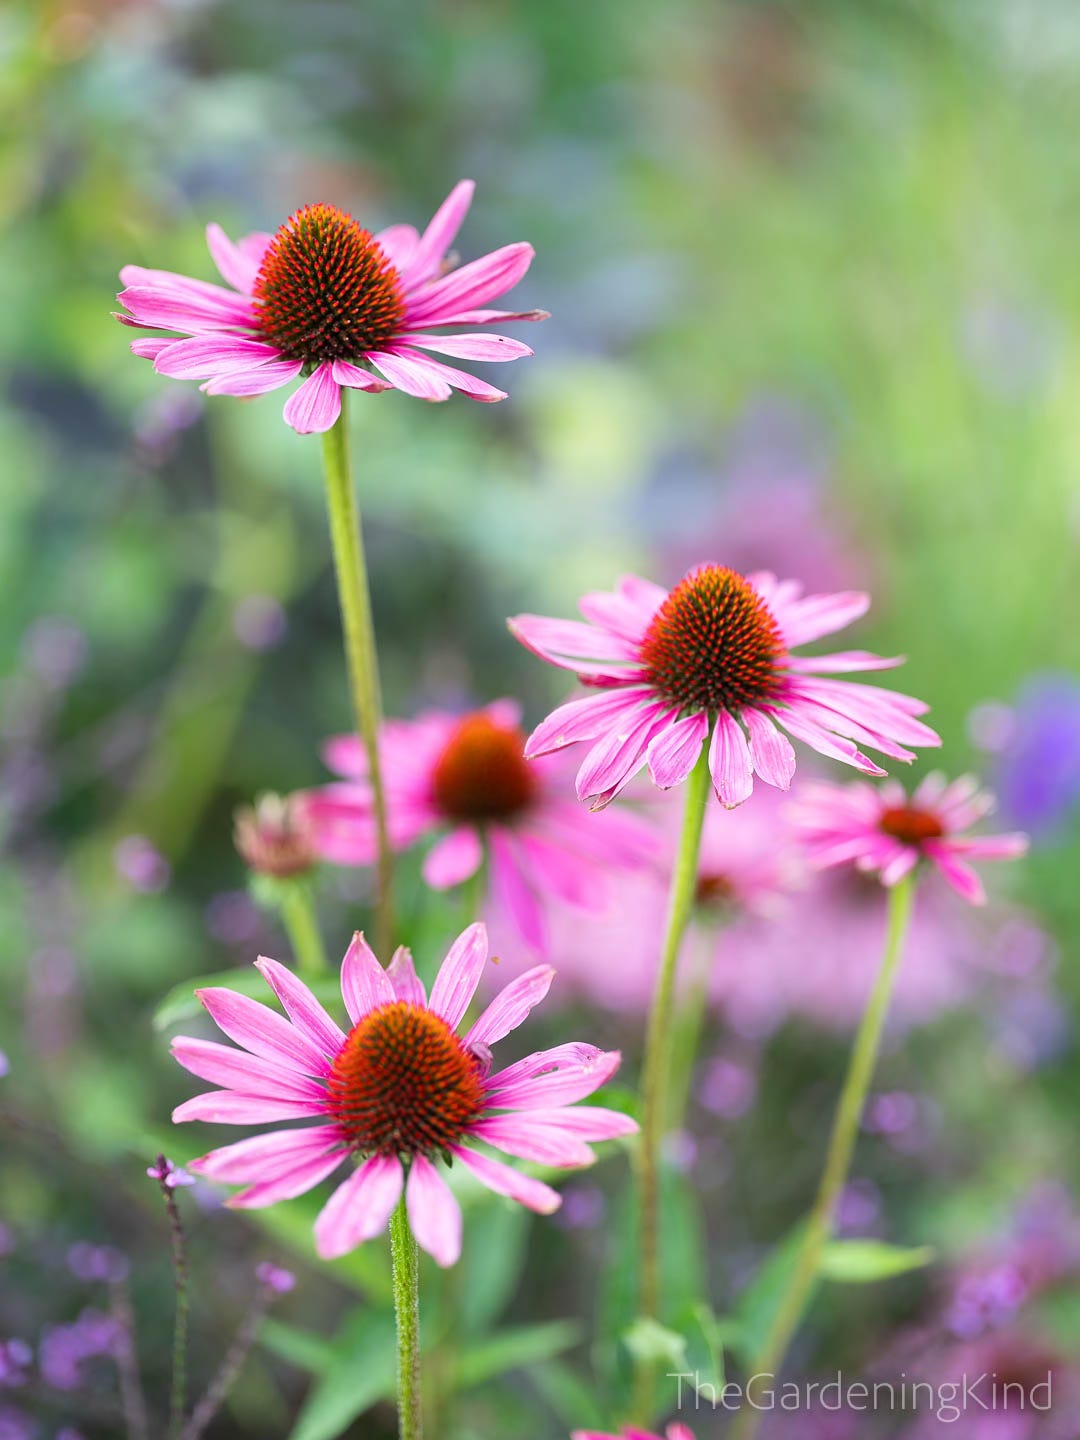
With the in-situ shots in the bag, move on to the plant portrait. Frame the healthiest specimen, ideally in several stages of flowering, so we can see the buds and flowers together. Then move on to an individual flower, leaf, and stem and combinations thereof. But do allow for some breathing space around the plant/flower.
Make the most of it
After you have the basics covered, you can experiment. Are there better compositions with a combination of flowers and plants? Does it have spiny or furry stems that would glow when backlit? Are there any pollinating insects or munching caterpillars for added interest? There maybe colours in the flower or foliage that are picked up and repeated elsewhere in the garden.
If you come across a perfect specimen do make the most of it! Don’t just bend over, snap it and post it. If it means that little to you, it will mean even less to others!
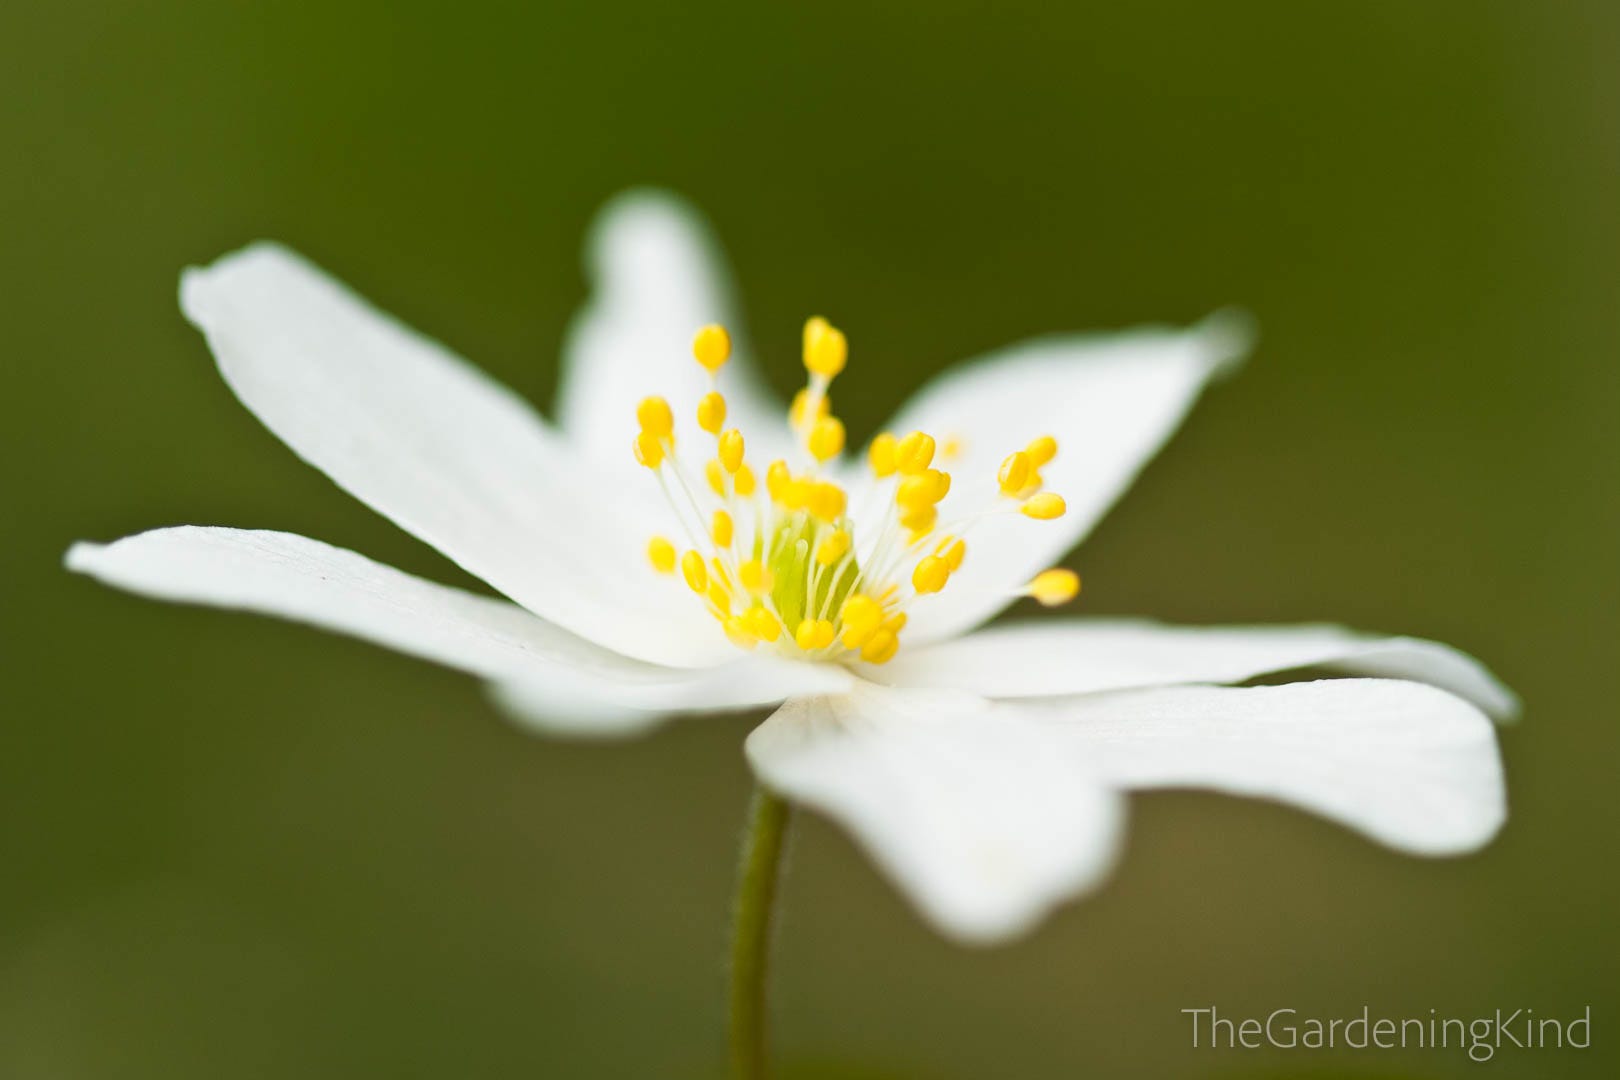
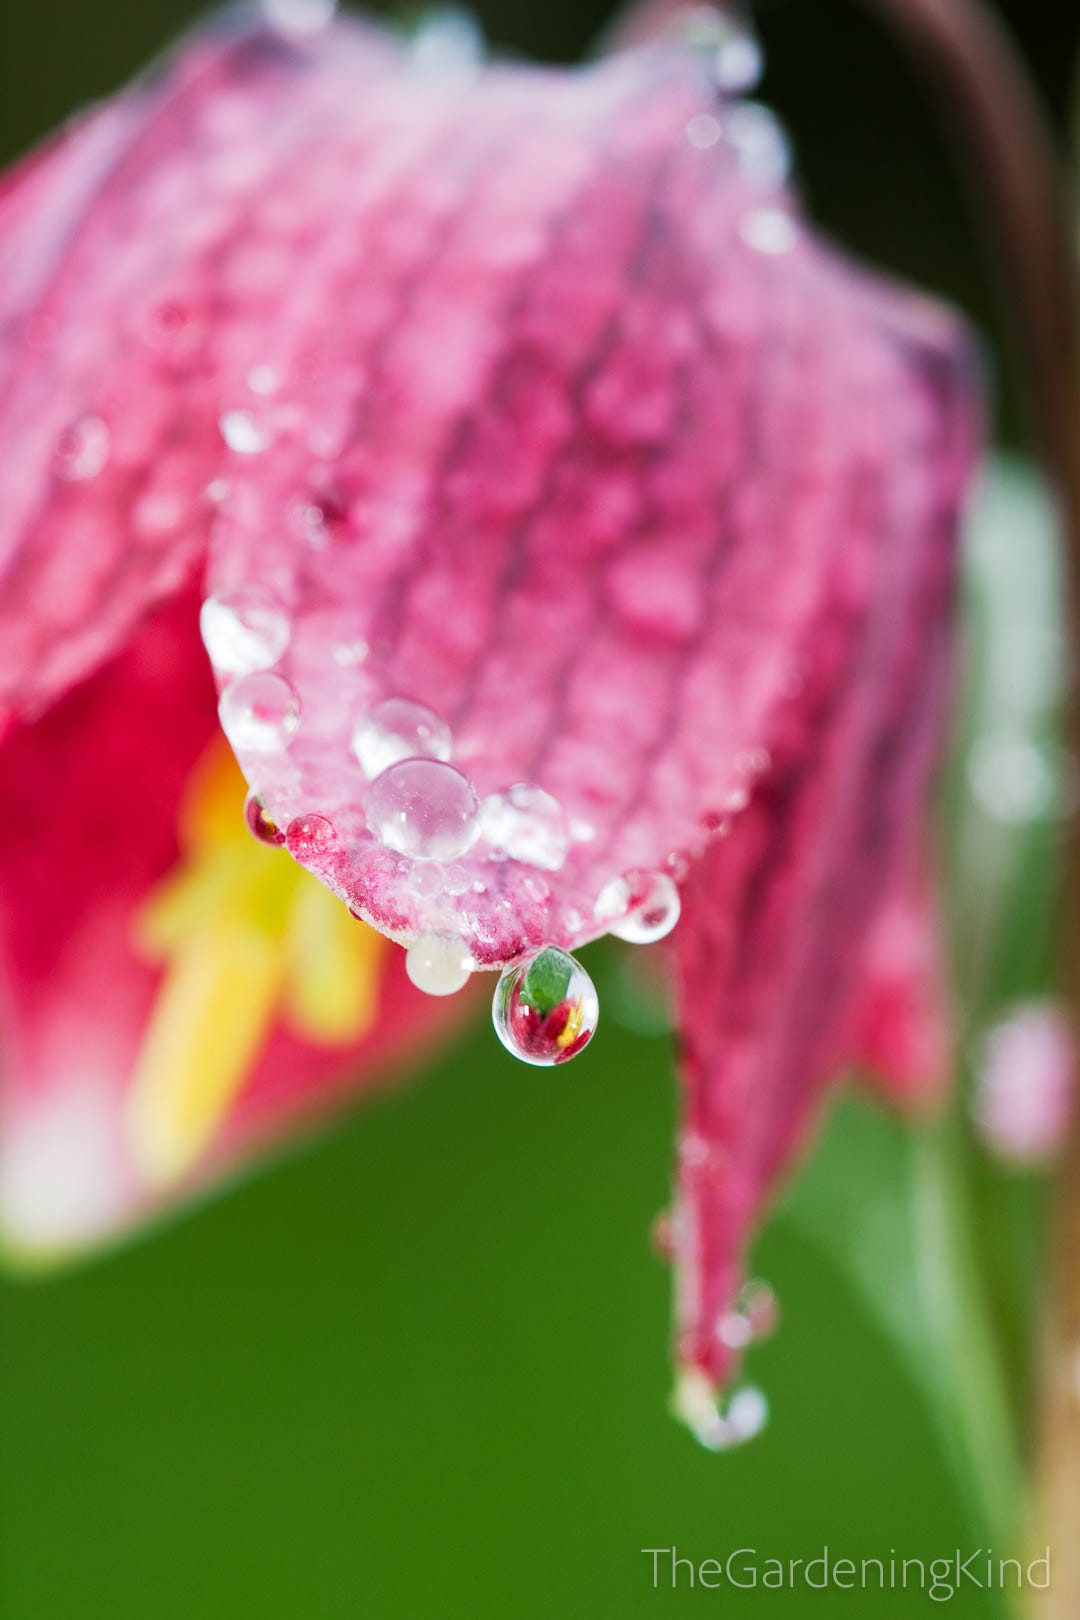
If you have a smartphone or compact camera with a zoom, then remember to use the zoom function! But don’t just stand in the same position, as if your feet have been set in concrete. Move around, change position, try various angles, closer in with a wider view and then zoom in from further away. Lay the camera on the ground, under the plant, point it towards a clear blue sky. Don’t forget your Macro mode for detailed isolations of the petals, flower structures (stigma and stamen, etc), and leaves as well as glistening frost, dew or rain drops.
Keep it clean
A little fussing goes a long way. In my garden, there’s always the obligatory taming of other plants to keep background distractions to a minimum, followed by a close-up inspection for any obvious detritus on the blooms. I always have secateurs with me to trim away any bothersome stems waving around in my framed view. A small, soft brush is really useful to remove anything distracting closer-up. The little touches go a long way.
Portrait diffusion
To capture that isolation (where the flower is in crisp focus but the background is diffused), traditionally you’d have used a large aperture and longer telephoto lens or a macro. With small lens smartphones and fixed apertures you really have to rely on software like ‘cinematic mode’, your smartphone’s after effects, or a third party app.
But, it will always help if somehow you are able to photograph the flower, for example, further away from its background. However, if the background can’t move, you could always snip off a flower stem and move that. It’s not cheating. You’re just being creative! The same goes for potted plants… they can move!
Avoid the mundane
Time and again I see the same type of image. An open flower, filling the frame, with a view squarely from above. I get it. It’s natural to look down at a flower that way… But, at the same time, it’s fair to say this is THE most obvious and boring view! You have a magnificent bloom in front of you and you choose the one angle that remove any kind of texture and structure? So, change the perspective.
Lower your point of view. Bend over or kneel down and photograph the flower from the side - a profile. From the side, you’ll capture the structure and relief of the flower, petals, stem and all, preserving that three dimensional perspective. Some parts will be in focus, others diffused. It’s so much more engaging for the viewer.
If you’re unsteady kneeling down, take a garden kneeling pad or a chair/stool with you. Anything to make it more comfortable so you won’t feel rushed because your knees or back are screaming at you. I really want you to enjoy these sessions, not feel like you’re in purgatory.
For ground hugging plants, you might need to get right down and dirty! On your knees and elbows for a pet’s eye view. A simple beanbag or even a plastic plant pot enables you to photograph from an ultra-low point of view - with the added bonus that you’re resting your camera on something stable for a crisp sharp image. Sometimes I’m laying flat out on a pathway, with my camera and lens resting directly on the ground. Yes, it draws a few odd expressions from passers-by, an occasional “Are you ok down there?” but that’s absolutely fine…
We’re capturing beauty here!
Focus on what’s important
It doesn’t matter if some of the plant is out of focus, or even whether some of the petals in a close-up are blurred. This adds a certain painterly quality to the image, while focussing the viewers attention where you want it. However, make sure whatever is in focus is sharp and a prominent part of the composition, so there is a strong focal point. For example, I focus on either the petal edges of those ruffled double roses, or the central disc floret of daisy-type flowers, like Cosmos.
Complementary conditions
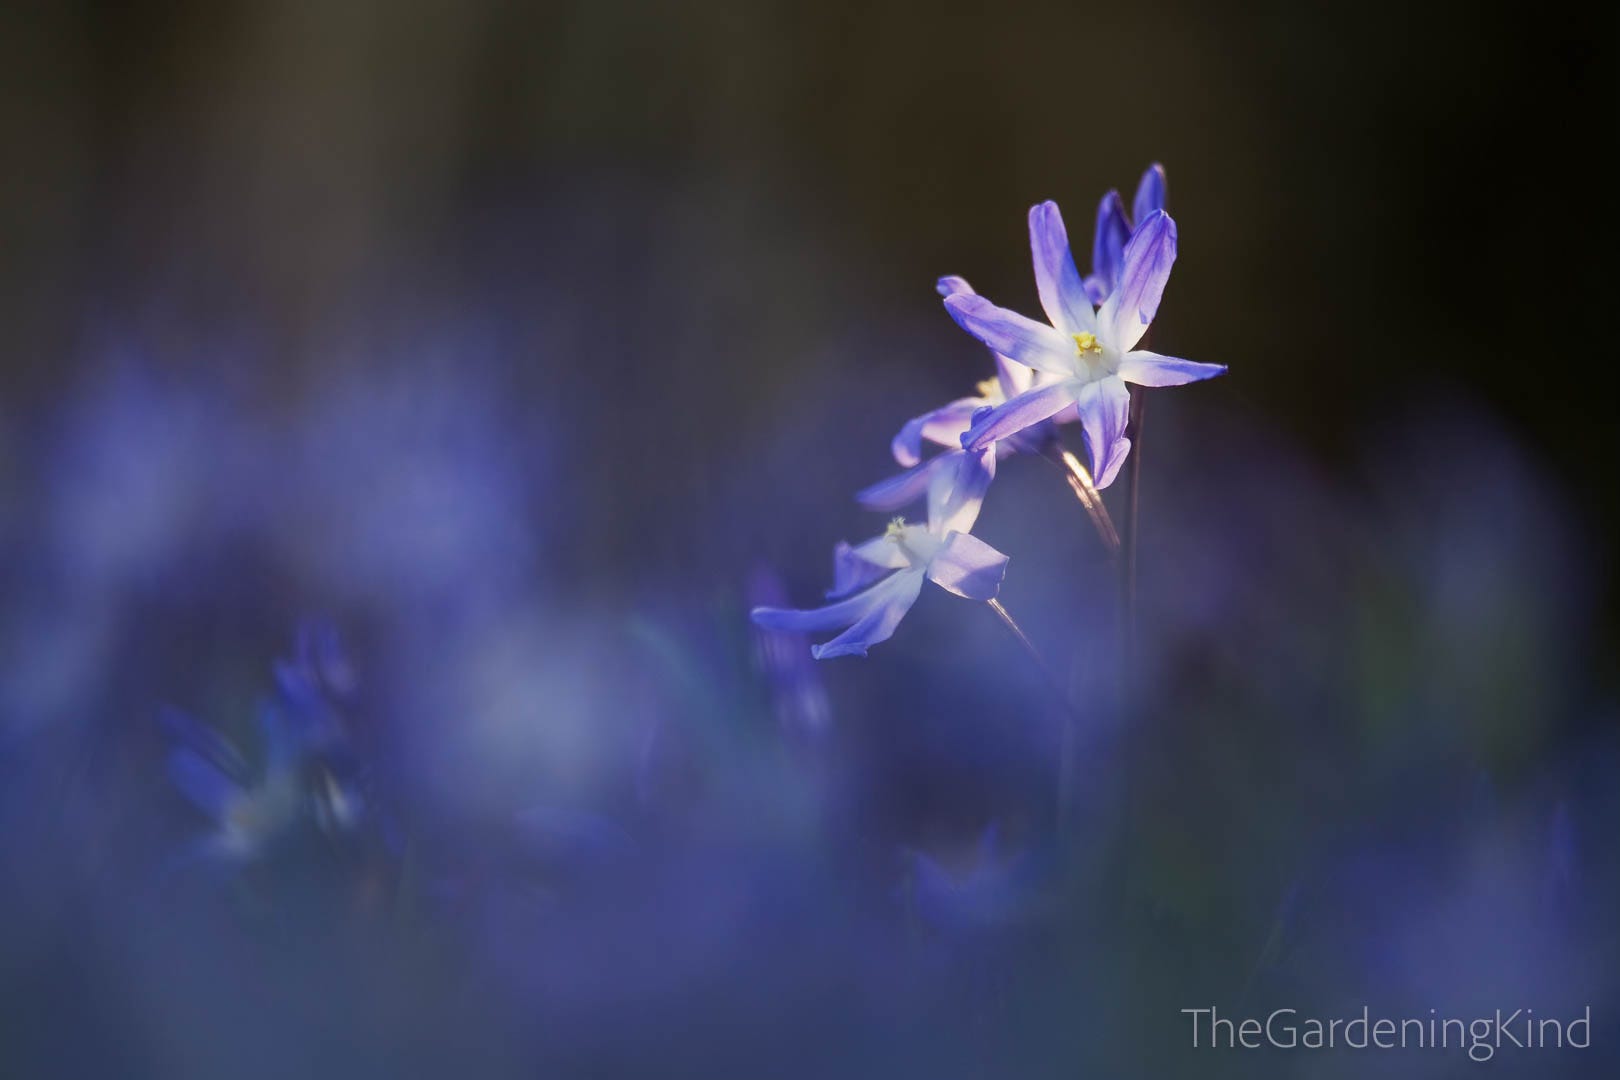
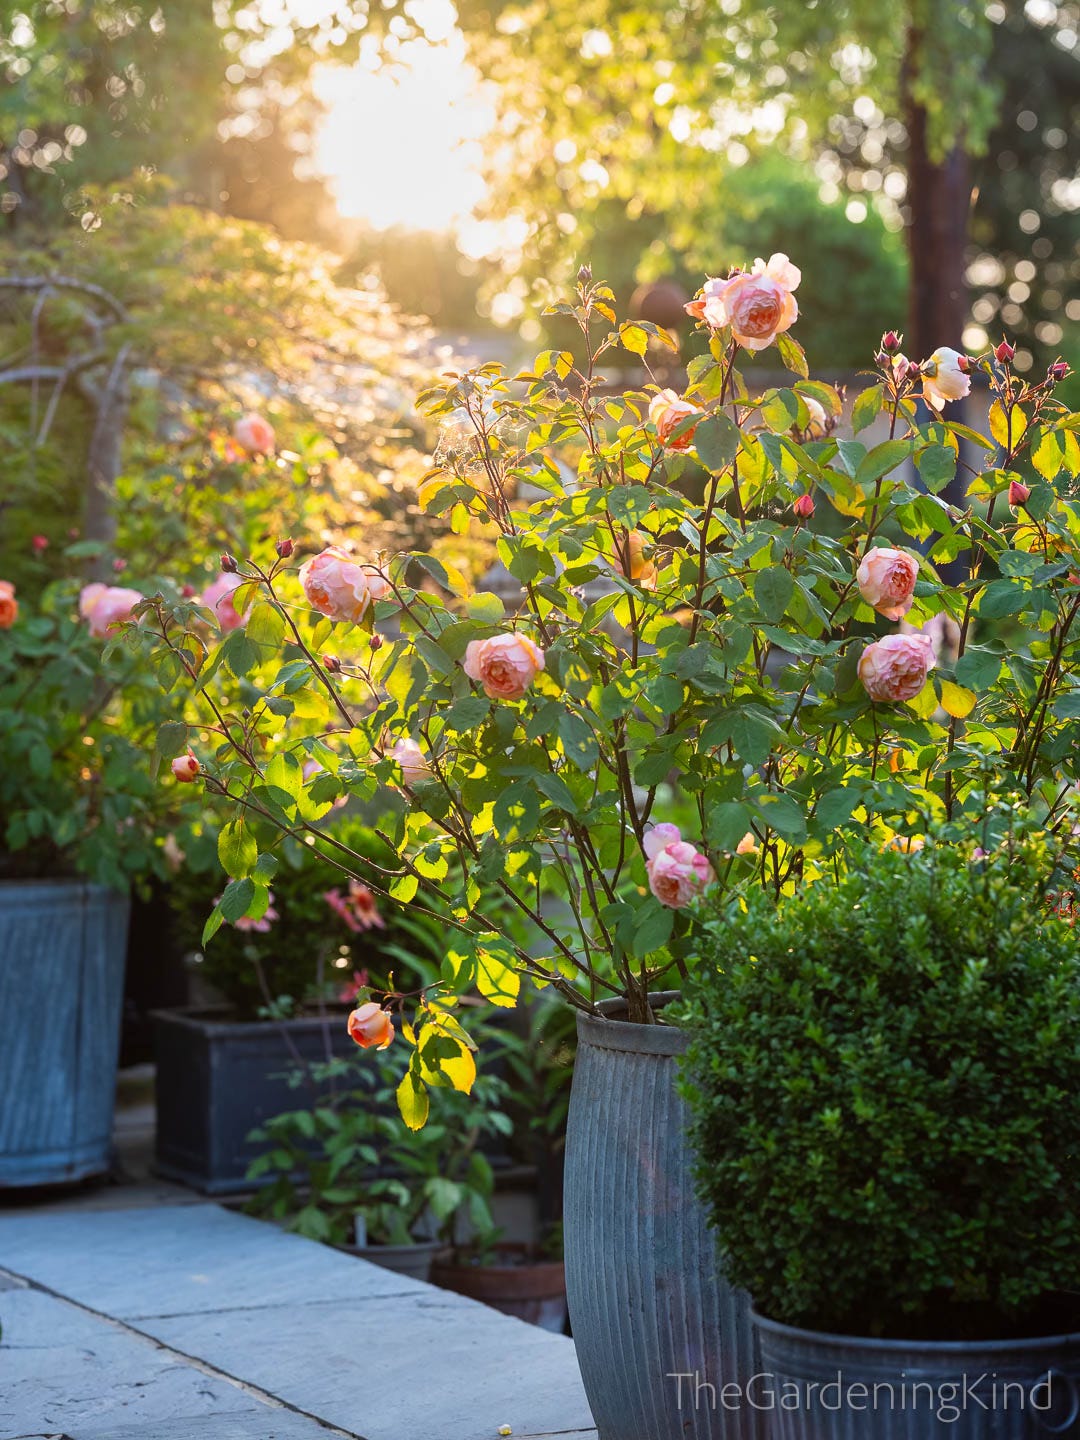
Wherever possible, I photograph at either end of the day or in bright but cloudy conditions. I always avoid glaring sunshine. The contrast is too harsh and the colours are bleached and flat. The muted light in overcast conditions reduces contrast and helps saturate colours. You’re looking for that higher white cloud, rather than low grey murk.
For a magical sparkle or colour-saturating light, you can head out early and capture the dew or frost and that magical dawn sunlight, or wait until later and capture the evening’s golden hour. Photographs captured in the golden hours just sing!
For an added dimension, you can (really cheat and) spray flowers with water to get the ‘dew laden’ or ‘fresh rainfall’ appearance. Be warned, though! It’s difficult to do well and most images end up with the ‘just dowsed with a hose’ look. Ooof!! Try a simple garden sprayer and go lightly!
Flowers en masse
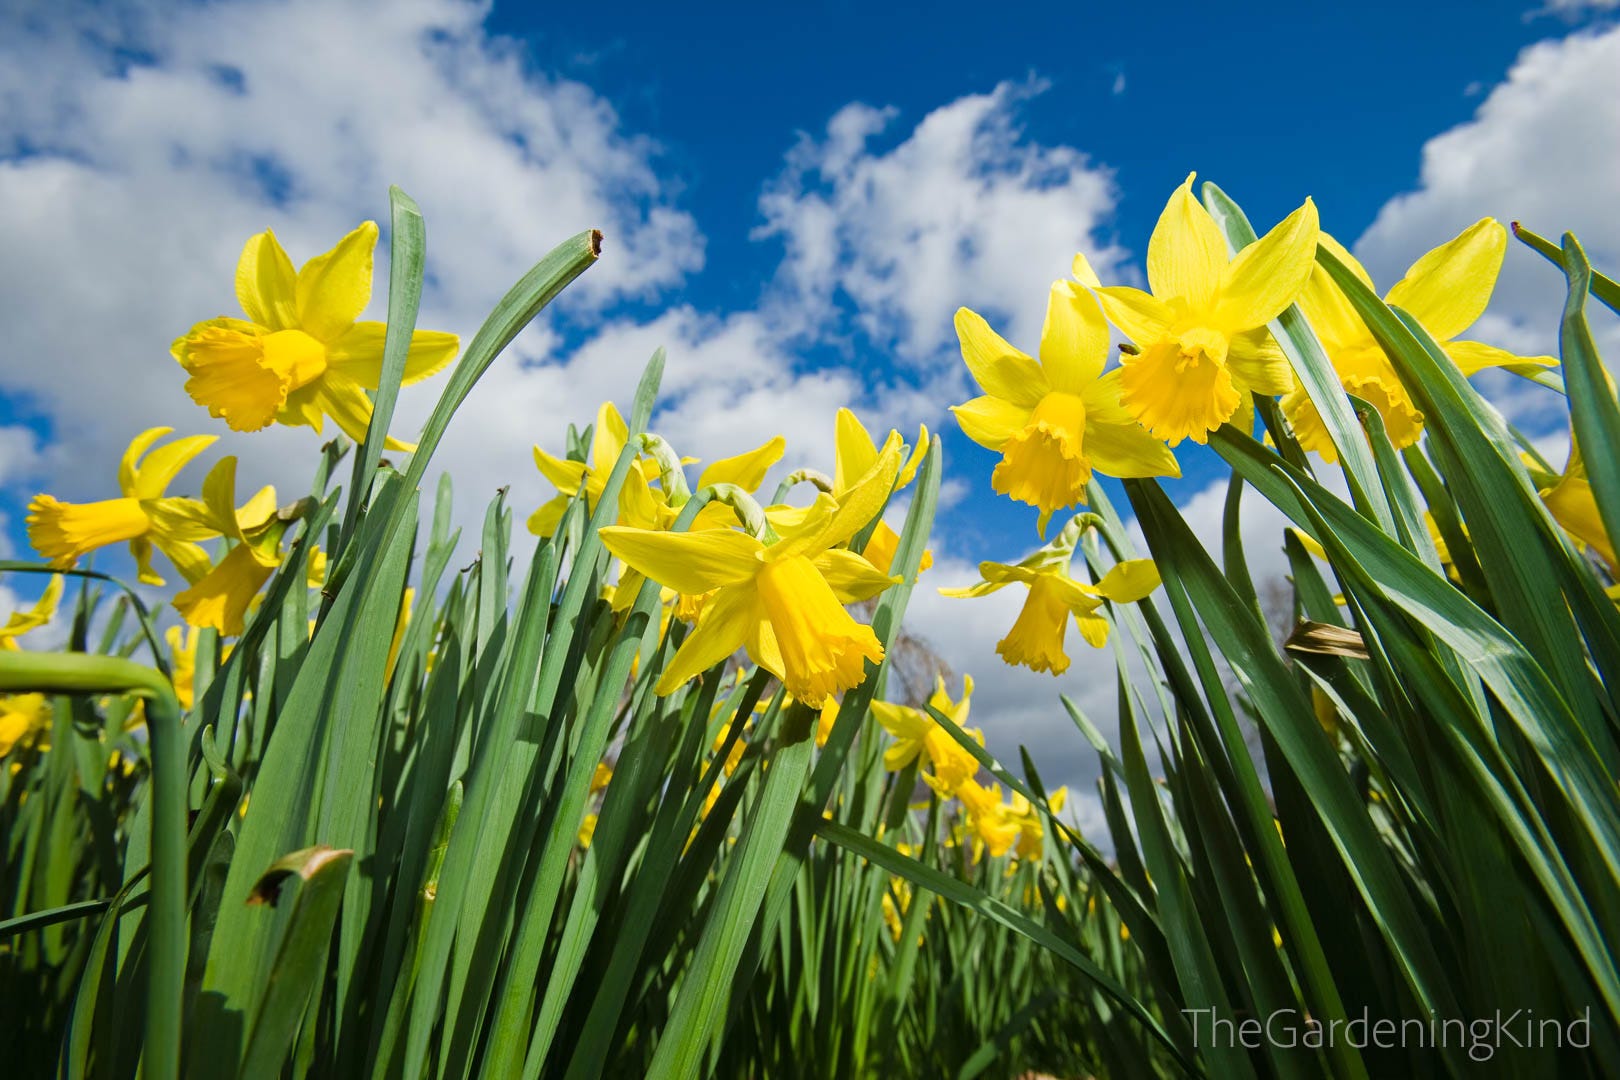
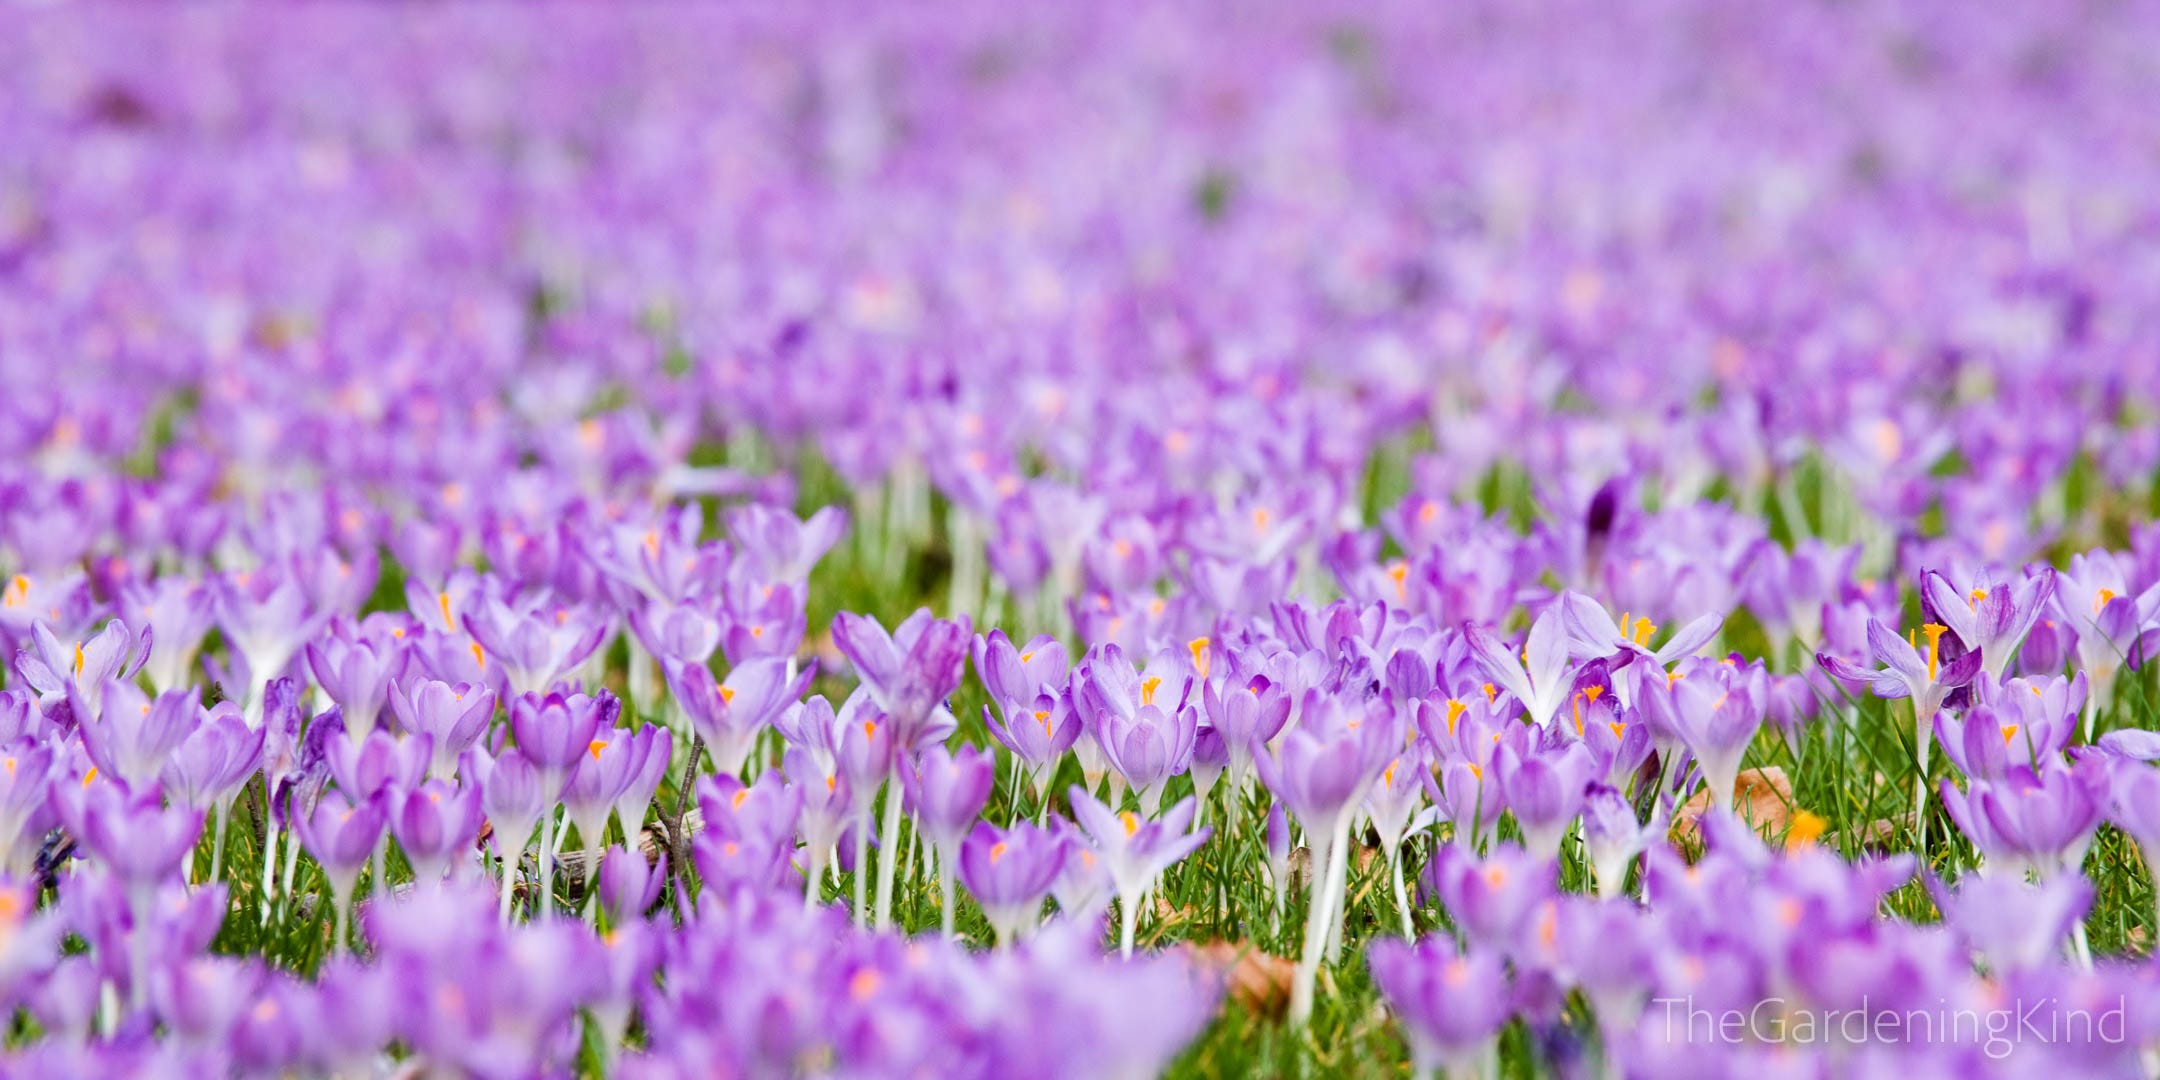
Spring in the UK is spectacular! Various stately homes, private gardens, National Trust properties, and RHS gardens offer you the chance to walk amongst swathes of snowdrops, carpets of crocus, drifts of daffodils, and show-stopping tulips.
In our ancient and semi-ancient woodlands you’ll find the jaw-dropping natural wonders of wildflowers: Snowdrops, wood anemones, ramsons (wild garlic), or bluebells. Along coastal paths you’ll find cushioned mounds of thrift (sea pink) and sea campion. Summer brings fields of stunning summer cornflowers, chicory, or poppies.
Flower farms are stocked with row upon row of the most incredible blooms and many are open for ‘pick your own’ or even their own photography workshops. The sheer volume of colour and diversity of blooms is enough to literally overwhelm the senses and you’d be forgiven for not knowing where to aim your camera first.
My approach to ‘mass plantings’ is always methodical, working from the outside in. I start with the long (zoom) lens, isolating groups of blooms and composing en masse vignettes with a greater depth of focus for more detail. A longer focal length compresses the field of view enhancing that dense ‘carpet’ effect. I move closer and closer, isolating individual pristine groups and blooms, eventually positioning the camera within the flowers and photographing through a haze of colour.
Throughout, I experiment with backlighting, focal points, different angles, etc. I then move on to the wide-angle to include the surrounding environment. This could be a stately home or garden architecture, the massive trunks of an ancient woodland, a rocky coastline, or a crowd of onlookers enjoying the wonder of flowers. If it’s a new location, you can leave the context shots until last, after you’ve worked your way around the display and noted the best backdrops.
A bug for interest…
Lastly, if you’re looking to (really) photograph pollinators enjoying your blooms, or just to keep a record of the inhabitant of your garden, you’ll need to head out early. Insects and other invertebrates are cold blooded. Most will spend the night motionless on flowers or clinging to stems further down. Come morning, they’re very slow to move as they need to warm up before they take flight.
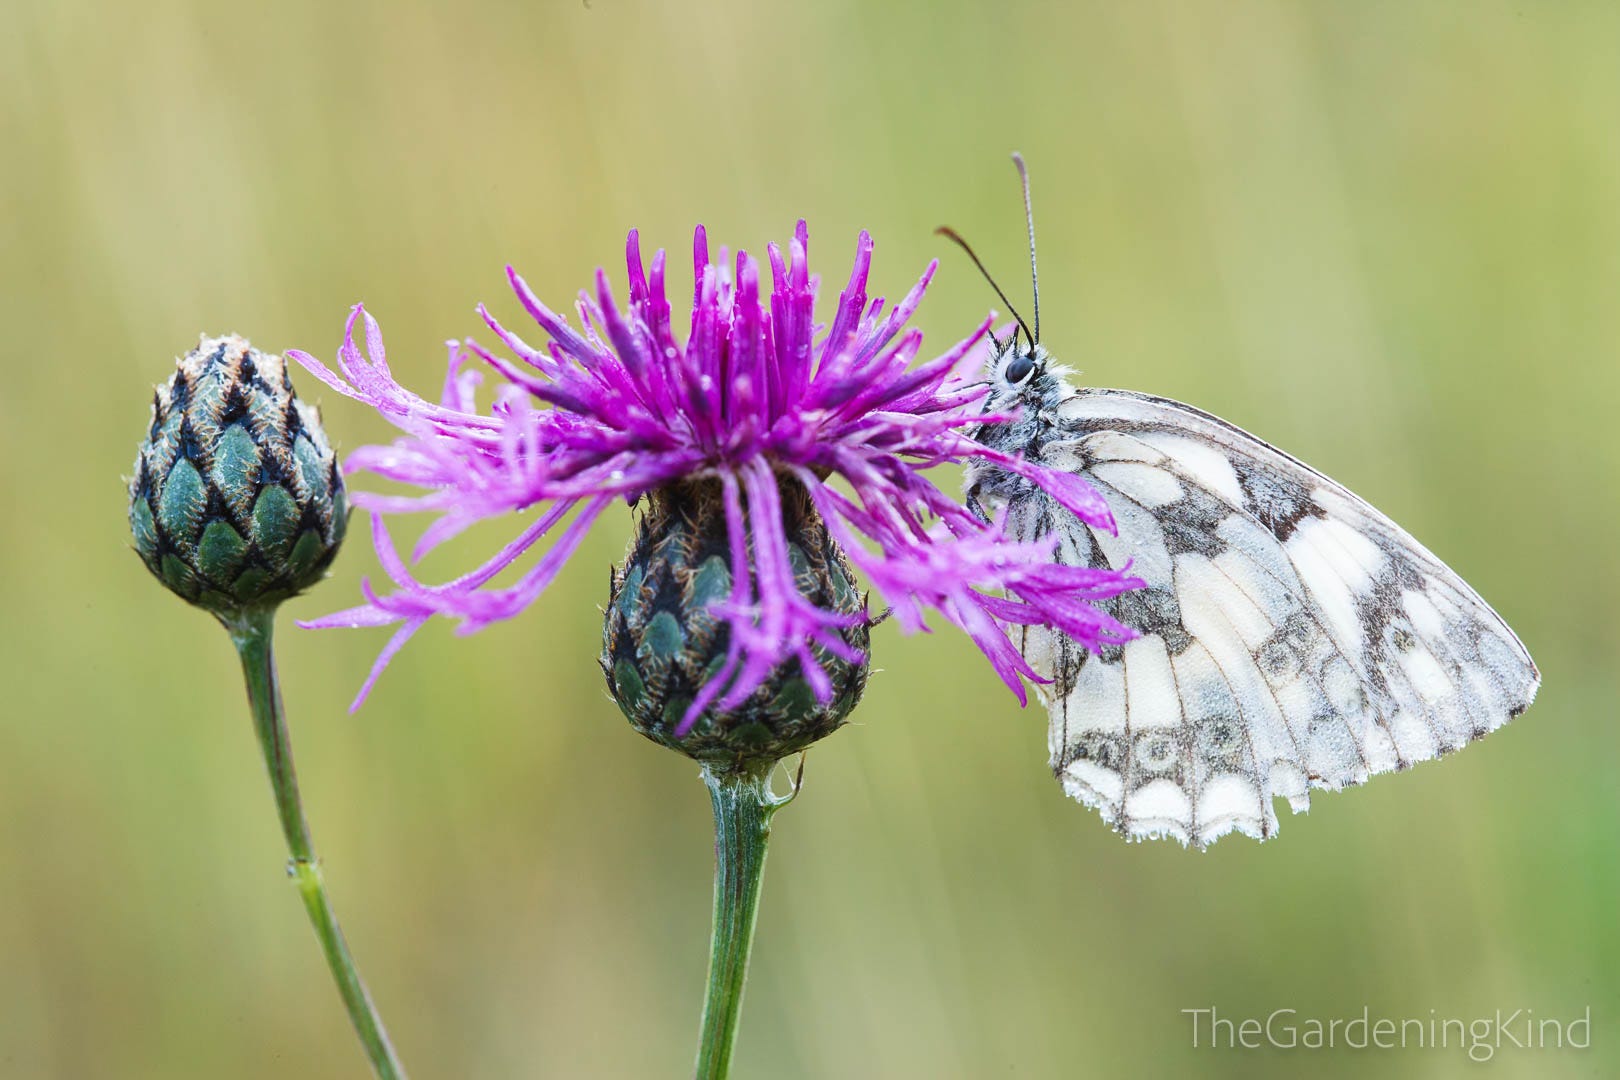
Moths can fly at night because they can regulate their body temperature. To some extent, bees and butterflies can do something similar… if you disturb them at dawn, before they’re ready to fly, you’ll see them vibrating their wings to raise their body temperature (if you see this, you’re too close, so back away). For the vast majority, however, early mornings after a cool still night are your best opportunities to photograph winged pollinators like bees and butterflies.
Although it requires a very early start, it’s so much easier, so much more productive, compared to running after nectar-fuelled, full-throttle bees and butterflies in the middle of the day!
Coming up…
We’re going to look at Garden Accessories, i.e. the design embellishments, garden decor, those finishing touches. It’s something I’ve only come to appreciate myself, very recently, and why I felt certain gardens (including my own) felt a little flat, even sterile. It’s only when I was visiting other gardens, the penny finally dropped:
It’s good to add character!
Great post - you need to run a webinar!
Thank you, this is great! I started out a few months ago with flower photography using a borrowed canon and olympus. There are some really valuable things here I didn’t know about!