

The Shady Garden: No.3 What to Do When Shade Happens
Design tips, soil fixes, and planting tricks to brighten even the gloomiest spots in your garden.

If you’ve made it this far, you’ll know by now: shade is a spectrum.
Light levels shift. Soil conditions vary. And thankfully, there are some fabulous plants that don’t just put up with it… they thrive.
In Part Two, we explored those quiet doers and foliage stars, the ones that perform brilliantly in tricky spots. But let’s be honest: even the best plant list won’t magically fix a gloomy corner.
A border in constant shadow, a courtyard stuck in permanent twilight… these places need more than just clever planting. That’s what this final post is all about.
Not what to plant, but how to make it all work: structure, contrast, clever planting tricks, and a few tips to brighten even the gloomiest corners.
I’ll be using my own garden as a case study. There are successes, stumbles, and ongoing experiments… but plenty, I hope, to inspire.
🌿 Case Study: The Shady Table
Type: Small container garden, terrace/patio
Aspect: North-facing wall
Light: Early morning and late evening sun in summer, light shade between.
Planting: Foliage stars - hostas, ferns, Japanese forest grass
Tucked under the north-facing gable on the Terrace, the Shady Table began as a bit of a cover-up. A makeshift table to hide the less photogenic bits of the house: drains, utility meters, and the like. Over time, it’s become one of my favourite areas of the garden. A place of peace and tranquillity, where I can pause and breathe deep.
The latest incarnation is another simple treated timber construction. This time built to allow drainage from above, reinforced and strong enough to support a (frankly) indecent number of pots. It’s painted in Cuprinol Muted Clay (a soft aged grey), backed by an off-white wall, and surrounded by galvanised metal and black ceramic containers.
This is a container garden in light shade, and it just sings.
More planters have arrived over time: more hostas, more ferns, and a swelling tide of foliage. The large galvanised baths at the front were separated, to make space for a large Lotus Bowl water feature. The sound of water, the gentle movement and reflections, the coolness it adds on hot days… all of it elevates the space and turns that shady spot into something properly alive.
To the west, a mature silver birch keeps the mood cool with filtered light, casting a far-reaching afternoon shade. The colour palette is almost monochromatic green, but still feels lively and layered, thanks to the varying hues of hostas and the contrasting forms of ferns, Epimedium, Polygonatum, and the wonderful floating Japanese forest grass, Hakonechloa macra.
Above the hostas, on a literal blank canvas of white wall, I installed a triptych of mirrors. The effect was immediate and absolutely astonishing. The once-boring expanse of wall now glowed, lit with reflections of sunlight gilding trees in the Flower Garden and snatches of blue sky beyond. The whole scene was transformed. Sunlight and sky, seemingly drawn down into the shade, now shimmered gently amongst the leaves.
What the Shady Table has taught me is that container gardening in shade is not just possible. It’s surprisingly rewarding, rich with opportunity. The key is scale, rhythm, and form: large pots, varied textures, and the willingness to nurture the space and experiment.
Shady Table brings life, brightness, and structure to a part of the house and garden that might otherwise be ignored. A glorious feature to be enjoyed, rather than an awkward spot you’d prefer to pretend wasn’t really there.
Another Year with Hostas and Other Garden Affairs

I’ve been growing hostas for years, though, I’ll be honest, not always successfully. My very first experience was probably much like yours: buy a pristine, perfect hosta, plant it with the utmost car…
Fix the Soil, Not with a Fork
Soil in dry shade can be tired, compacted, or simply starved of life. But you don’t need to dig trenches to turn it around.
My garden is no dig. No matter how bad the soil is, I don’t disturb it. If it needs improving, I simply layer on organic matter and let the soil life do the heavy lifting. You have to be patient though. They’re not JCBs, these microbes.
Over time, trillions of lifeforms will digest the organic mulch, move it around, pull it down, create pathways and air holes, and improve nutrient levels, structure, and drainage.
That’s my recommendation. I know there’ll be some ‘hardcore’ gardeners who can’t wait and feel idle if they’re not out with a garden fork or double digging everything. Feel free to enjoy the back pain, my friends. That’s not in my playbook.
Tip: Do yourself and the soil a favour and leave those fallen leaves where they are. If you’re always clearing them away, you’re removing natures own marvellous mulch.
How to Garden With (Not Against) Tree Roots
Tree roots aren’t the enemy. But they do make gardening… interesting.
If you’ve got mature trees with colossal, partially exposed roots, you can still garden around them. It takes time and patience, yes. For the diggers among us, the approach is slow and careful: draw back the desiccated soil between roots, and refill with fresh, compost-enriched loam.
Prefer the no-dig route? Simply layer on the compost mulch and plant into that. Easy! Homemade compost is excellent (I’ll be posting a full guide on making homemade compost in a few weeks). Proper compost is full of microbial life, generated from the rest of your garden. You can quite literally fill the gaps between exposed roots with nutrient-rich material, then plant straight into it.
Leafmould is another great option. It’s not rich in nutrients (many woodlanders aren’t hungry plants anyway) but it’s brilliant for improving structure and supporting soil life. And really, can you think of a more perfect use for it?
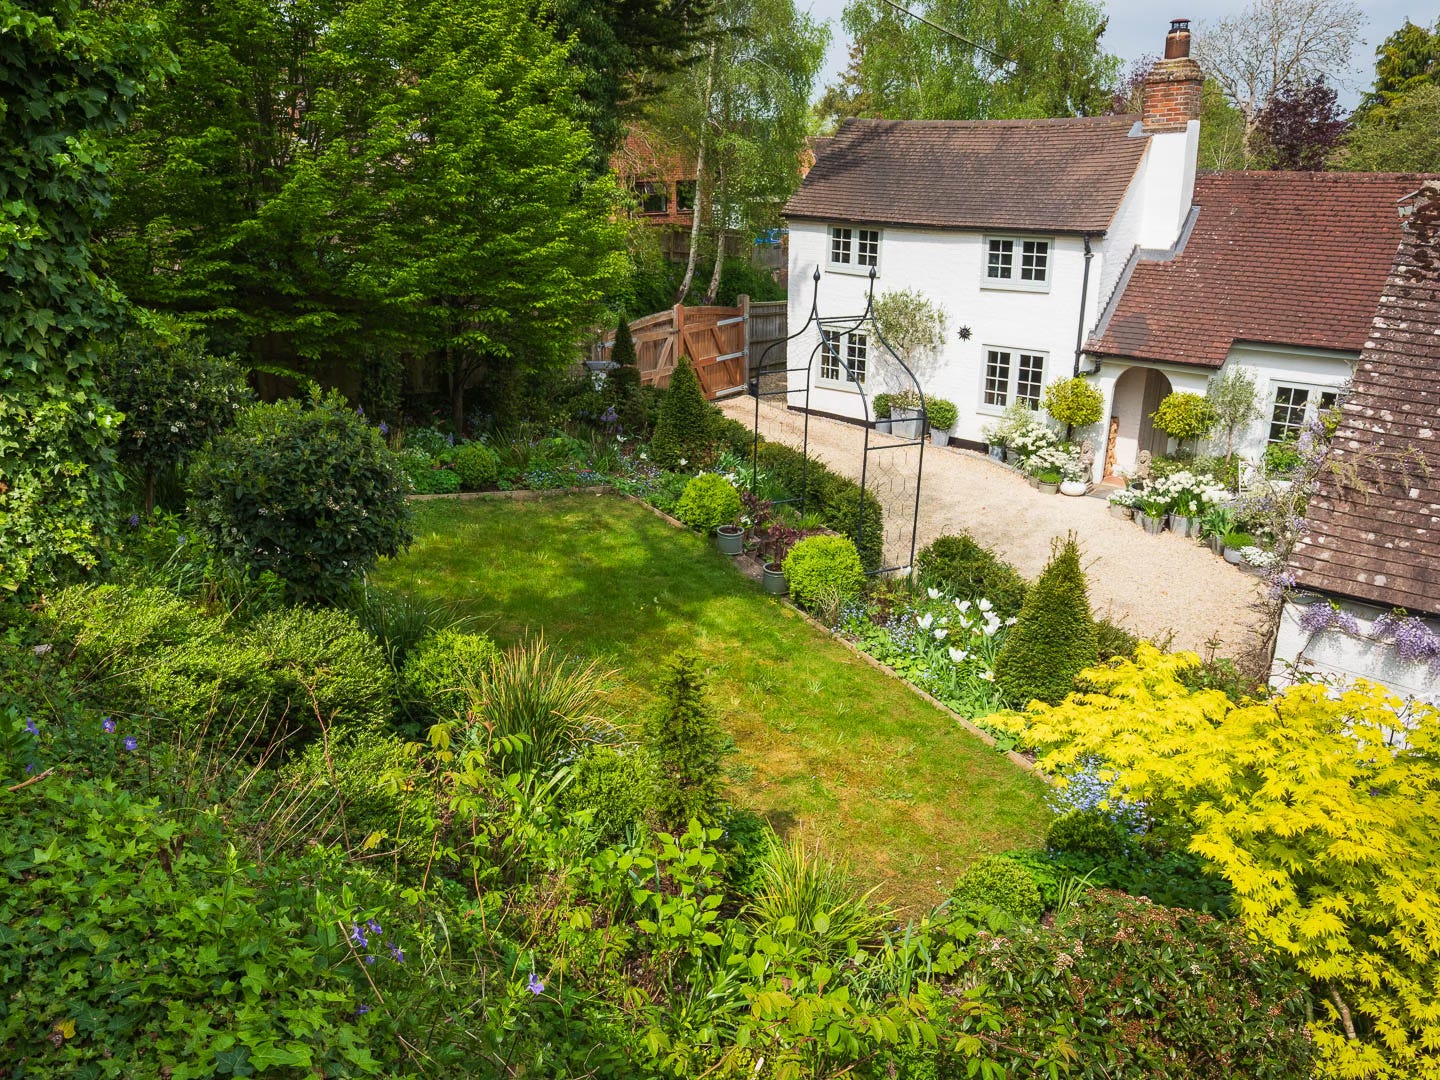
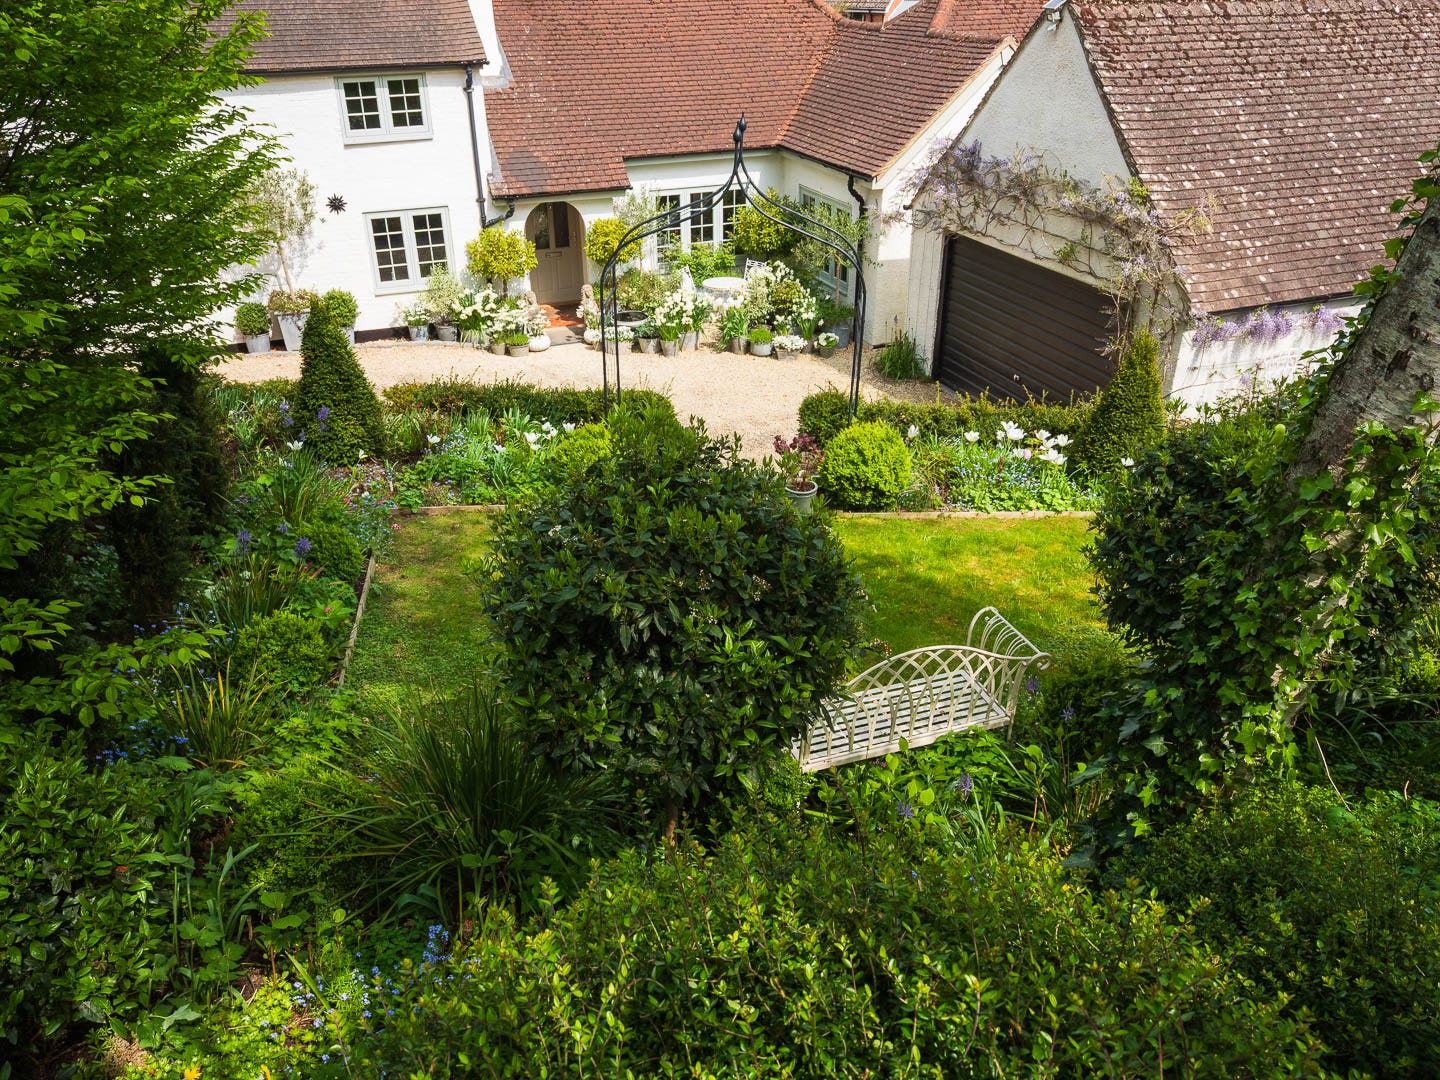
Case Study: The Cottage Garden
Type: Conventional mixed borders, small lawn, mature trees, rose border
Aspect: North-facing, dry, sheltered, sloping
Light: Early morning sun, dappled light, pockets of full shade
Planting: Spring bulbs, herbaceous perennials, topiary, flowering shrubs
In my dry and shady Cottage Garden, the trickiest spots aren’t always directly under trees, but often just on the edge of their reach.
Reaching out from the trunk, roots are well-established. They may look formidable, like great stone tentacles, but the drinking and feeding roots are mostly out at the margins of the overhanging canopy, often surfacing in lawns or borders, drinking up the water and nutrients we gardeners are only too happy to (inadvertently) provide.
When I dig planting holes in the Cottage Garden, it’s often the feathery tips of ash, birch, or hornbeam that turn up a few inches beneath the surface.
It’s not an easy site. There’s always competition for light, moisture, and nutrients. It’s also sloping, and water prefers to run off rather than soak down (although mulching really helps). New planting just needs time to establish before it has to compete with its big, bad neighbours. And I’ve found that really is the key.
When I find tree roots in the hole, I carefully trace them back around 30 cm (about a foot) and make a clean cut. This gives the new plant a little breathing room. A window of peace before the roots regrow into the nutrient-rich patch I’ve just created.

Before I plant, I fill the hole right to the brim with water and let it drain through. Sometimes it disappears in just a few minutes, so I fill it again. While that’s happening, I soak the rootball in a bucket of water for at least 20 minutes so it’s fully saturated. In goes a generous scoop or two of compost into the hole. It acts like a temporary sponge or sump.
Once the plant is in, I backfill and water thoroughly again, then mulch thickly. After planting, I water regularly for the first few weeks.
But the best time? The right time for success? Plant in autumn. Trees are winding down. They’re not drawing moisture to sustain leaves, competition is lower, and the rainfall is usually on your side. So, if you’re planning a shady border revamp, buy your plants during the season, but wait until autumn (if you can) to plant them.
It’s the best chance new planting has to settle in and hold its ground. Once planted, mulch the area repeatedly. Every year, add another layer. The soil will improve. But for as long as trees are drawing out moisture and nutrients from below, you’ll need to keep adding them from above.
Simple Watering
For truly desiccated soil, I highly recommend an irrigation system. It could be a drip line or a soaker hose. Placed on a timer, you can set it up and forget all about it. You can even connect these to submersible pumps in water butts.
Something I’m currently exploring is redirecting my guttering into IBC storage tanks, with a soaker hose taking the overflow and redistributing it into the borders.
(Watch this space)
🌳 10-Step Tree Root Survival Guide
How to plant near mature trees (without starting a turf war)
1. Dig gently between roots
Use a border fork, perennial spade, or small trowel to remove tired, dry soil. Go carefully. You’re gardening with the tree, not against it.
2. Refresh the soil
Backfill with improved soil mixed with fresh compost, or mulch the surface with a generous layer of compost or leafmould.
3. Watch the margins
Feeding roots often sit at the edge of the canopy, not directly under the trunk. That’s where competition is fiercest.
4. Cut smaller roots cleanly
If fine roots appear in the hole, trace them back around 30 cm (1 ft) and make a clean cut. This gives your new plant a head start.
5. Prep the watering
Fill the hole to the brim and let it drain. Meanwhile, soak the rootball in a bucket for at least 20 minutes. Get it good and soggy.
6. Plant, mulch, water again
Add compost to the base of the hole (like a sponge), plant, water thoroughly, then mulch thickly.
7. Keep watering
For the first few weeks, regular water is essential, especially in dry shade.
8. Plant in autumn (if you can)
Trees are winding down, rainfall is more reliable, and your new plant gets a calm head start, establishing its roots over winter, before spring growth begins.
9. Keep mulching
Improve the soil year by year. Garden compost, bought compost, and well-rotted manure all help lock in moisture and feed the soil. Leafmould is great too: low in nutrients but great for woodland plants.
10. Plan for long-term watering
Consider a drip line or soaker hose system to keep new plantings going through dry spells.


Interrupting the Sea of Green
Green is a beautiful colour. It glows, it radiates, it promotes calmness and tranquillity. It soothes a troubled mind. Let’s face it, it’s the colour of life in the garden, and I couldn’t imagine a garden without it.
But there can be too much of a good thing. A monochromatic scene can feel a bit dull to the gardener. You probably know my feelings on lawns by now… but yes. Yawn.
So let’s mix up the shady border. We don’t have the benefit of sunlight creating contrast or boosting punchy colours. Stick to green if you like, but vary leaf shape, form, height, and yes, shades of green. Punctuate it with foliage stars glowing in silver, gold, chartreuse, burgundy, and plum.
Tip: Add a white bench, garden art or decor. Something to break-up the scene.
In my shadiest border (the Hornbeam Border), I mix buxus balls and yew columns for solid structure. Both bring different greens, different forms. On the ground floor, Pulmonaria comes next with spotted leaves and flowers in whites, pinks, and blues. Tiarella adds frothy white flowers and maroon-variegated leaves.
There are deep glossy hellebore leaves, with pastel or burgundy blooms in winter. Hardy geraniums sprawl around them in spring, with soft pink or white flowers, while Astrantia (with similar leaves) offers very different flowers: silvered, shimmering, and delicately upright. Self-sown aquilegias bring a change of leaf form and those remarkable blooms.
Brunnera ‘Jack Frost’ adds light with its silvered foliage and forget-me-not blue flowers. Libertia grandiflora spikes up, offering grassy contrast and airy white blooms. Behind them, arching ferns and the nodding stems of Solomon’s Seal. Then comes a bold break — Persicaria ‘Red Dragon’, with deep red and purple foliage.
Rising through it all: foxgloves, with densely packed flower spikes in white, purple, and pink, followed by thalictrums with floaty flowers that lift the eye.
Most of the flowers are soft shades: whites, pale yellows, pastel pinks, and blues. These glow in the gloom, whereas deep reds and oranges can often look muddy in shade.
The takeaway: play with form and foliage. Don’t plant all hostas and then wonder why it’s a bit flat. Mix it up. Add structure, cushion the base, lift the eyes, and scatter the garden with light. Add a focal point.
Tip: Forget the dogmatic approach to planting design.
That old rule of short plants at the front and taller ones at the back doesn’t always work in shade. If you’re planting under trees, the darkest, driest part is often at the back.
I plant thalictrums and aquilegias towards the front, where they catch a little more light. They’re fine and floaty, so they don’t block the view, just adding height, movement, and a touch of magic.
Design Tricks to Maximise Every Ray
A little light goes a long way in shade. You just need to help it along. In a shady garden, light is treasure. Rare, valuable, and worth enhancing wherever possible. A few simple design tweaks can make all the difference.
Don’t paint your fences black, or that horrid dismal forest green, unless you’ve got really bright planting to set off against the dark foil. Leave them natural to silver with age, or go pale (white, stone, sage green) to spread whatever light you get.
Add mirrors. Hang them on fences or walls. Tuck them into borders, screwed against a posts (securely fixed in the ground). Angle them to catch bright sky, dappled canopies, or the slightest gleam of sun. They also add a piece of theatre. A touch of magic and surprise.
If you’ve got mature shrubs casting deep shade, try crown lifting. Prune away the lowest branches to open up the ground beneath. This frees up planting space and lets light reach spring ephemerals like Cyclamen, snowdrops, crocuses, Scilla, and Erythronium. Something that brings joy early in the season.
Note: Identify your shrub or tree before reaching for the loppers. Some species need pruning at specific times and others won’t thank you for over-enthusiasm.
Containers, Contrast, and Seasonal Swaps
Even if your shady spot is paved, not planted, you can still do plenty. A shady border isn’t the only place for transformation. You can do a lot with containers, even in a gloomy courtyard.
Use pale or reflective pots (white ceramics, galvanised metal) and go big. Small pots dry out fast and can look cluttered. Larger containers hold moisture better, need less watering, and give you more room to play with mixed planting.
Fill them with shade lovers: hostas, ferns, hellebores, astrantias, foxgloves, epimediums, Solomon’s seal, violas, and spring bulbs. You can create seasonal displays by dropping in fresh pots as others fade. Tier pots at different heights using bricks or stands to add interest and layering.
The goal is to keep that corner feeling tended and loved, even if it never sees full sun.
Tip: Try hot-swapping. Have a few prized containers? Real gems? Don’t let them be hogged by plants that look good for a fortnight, then sulk. Instead of planting directly into the container, plant into recycled plastic pots and drop them in. When one fades, swap it out for something fresh.
It takes a little planning to keep the crescendo rising all season, and you’ll need a spot to store your ‘yet-to-shine’ stars. But it’s a brilliant way to keep a shady corner looking lively and loved.
Final thoughts…
Throughout it all, give yourself permission to experiment, get it wrong, and try again. Shade is a spectrum and you’ll need time for trial and error. But that’s how shady gardeners learn: not in great leaps, but in quiet layers. A tweak here, a swap there, a patient mulch-and-wait.
Shade teaches you to pay attention. To notice the details. The shift in light. The slow unfurling. The quiet resilience of plants that thrive where others falter.
So here’s to the shadowy corners. May they be rich with texture, full of life, and never overlooked again 🌿
Coming up…
Next time, we turn towards the light. I’ll be sharing what I’ve learned about growing sun-loving plants in beautiful pots and containers. Those resilient beauties that thrive in full sun and don’t mind life on the dry side. Expect practical tips, planting ideas, and a full list of tried-and-tested favourites from my garden.
This is brilliant Elliott. As you know, I’ve had to do a lot of digging. Now I plan to never dig again! So with you on the heavy mulch, not clearing the leaves etc. I’m so looking forward to planting my shady border, which is a tad tricky as the front of it gets a lot of sun.