

The DIY Propagation Station
I would LOVE a greenhouse! But I still don't have one... So, how do I propagate with protection? How do I grow strong seedlings and young plants ready to go out and grow vigorously? Here's the answer!

Like thousands upon thousands of other gardeners, I would LOVE a greenhouse! And despite listing one on every birthday and Christmas wish-list for the past ten years, nobody, I repeat nobody has taken the very subtle hint. Not even Santa! Dammit! (Okay, granted, they are a little more expensive than a pair of socks, but still?!)
The reasons why I still do not have the luxury of a greenhouse (and let’s be honest, it is a luxury no matter how small) are numerous and extremely dull, so let’s skip that bit. Suffice to say, I really, really, really want one!
Why do you need a greenhouse at all?
Essentially, growing ‘under cover’ or ‘under glass’ provides fragile seedlings and young tender plants with ‘protection’ from the elements and various pests. They give you a light, warm location, out of the wind and driving rain. They heat up quickly in the day and are slower to chill at night. It’s a controlled space.
They’re not entirely foolproof. Sometimes temperatures get so low it will frost inside and if you don’t vent them properly they can act like an oven. Occasionally pests like slugs and snails will work their way in, usually on the bottom of pots and tray left outside. But on the whole, they are a great investment. Plants can be fleeced. You can install heating and auto-vents. You can be vigilant against pests.
Compared to direct sowing, where emerging seedlings are at the mercy of the elements and voracious predators, growing undercover is literally a game-changer (and I do not use that term lightly). If you can, get your crops and ornamentals going under glass. Then plant out healthy, strong, vigorous young plants.
The propagation gap
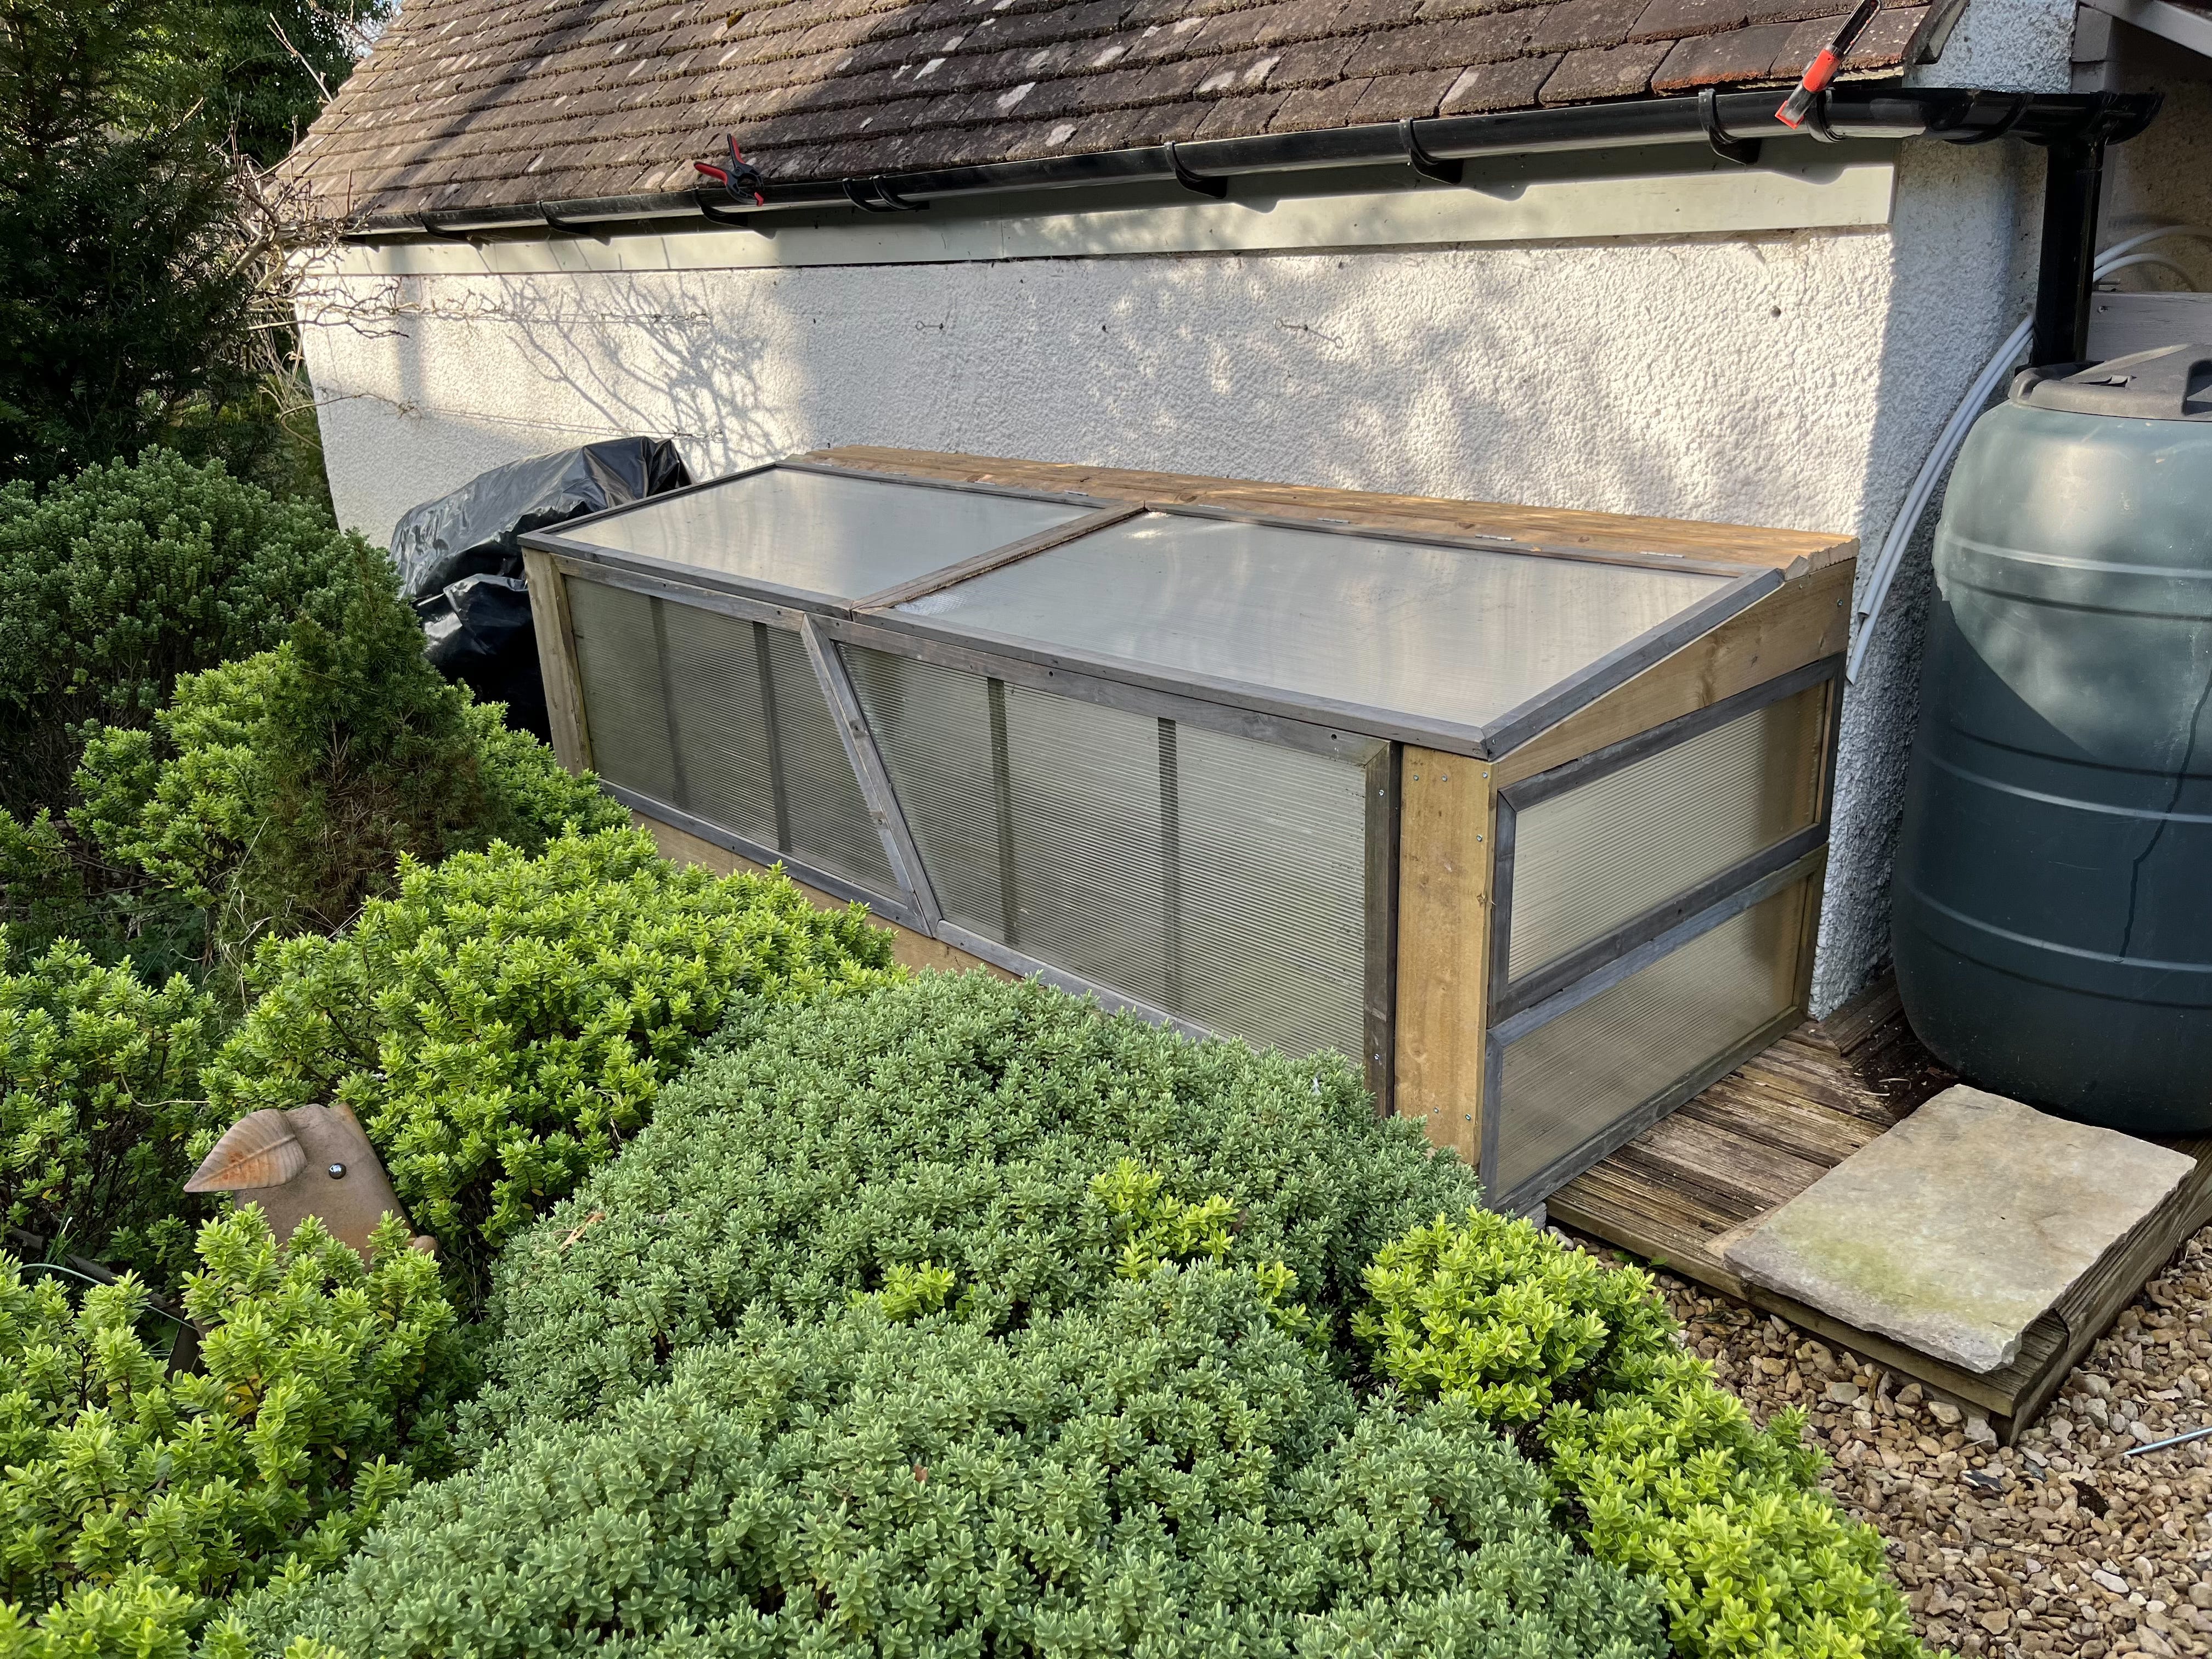
To fill the gap in my propagation workflow, I tried coldframes. Maybe it’s because I bought them from the ‘middle of Lidl’, maybe it’s because they weighed less than a pack of butter, but I wasn’t exactly filled with confidence!
My doubts were fulfilled when, after just one year, the perspex panels shattered. Short-lived though they were, the coldframes did keep out the slugs and snails… mostly because I fashioned a fine-mesh base to stop those malevolent mollusks climbing up inside. I took them all apart, salvaged the good parts and then built myself a super-deluxe model (below).
So where am I right now with my propagation gap? Well, it’s rather snugly filled with a makeshift propagation station, setup in my north-facing conservatory aka Garden Room. My cottage is in Southern England, 51° North, located on the north face of a hill.
My seed sowing ‘struggles’ are mainly due to insufficient light. I only have four small south-facing windows and I am forbidden to store trays of seeds there. Something about messing up the living room or bedroom? Not wanting water splashing on the sofa…? Not tying in with the decor…
Anyhoo, the ‘station’ was born out of necessity. Thinking about the myriad of options, I wanted the biggest bang for my buck, with very limited space. How do I grow more than a dozen seed trays and then more than a hundred 9cm pots all with just 1m² footprint?
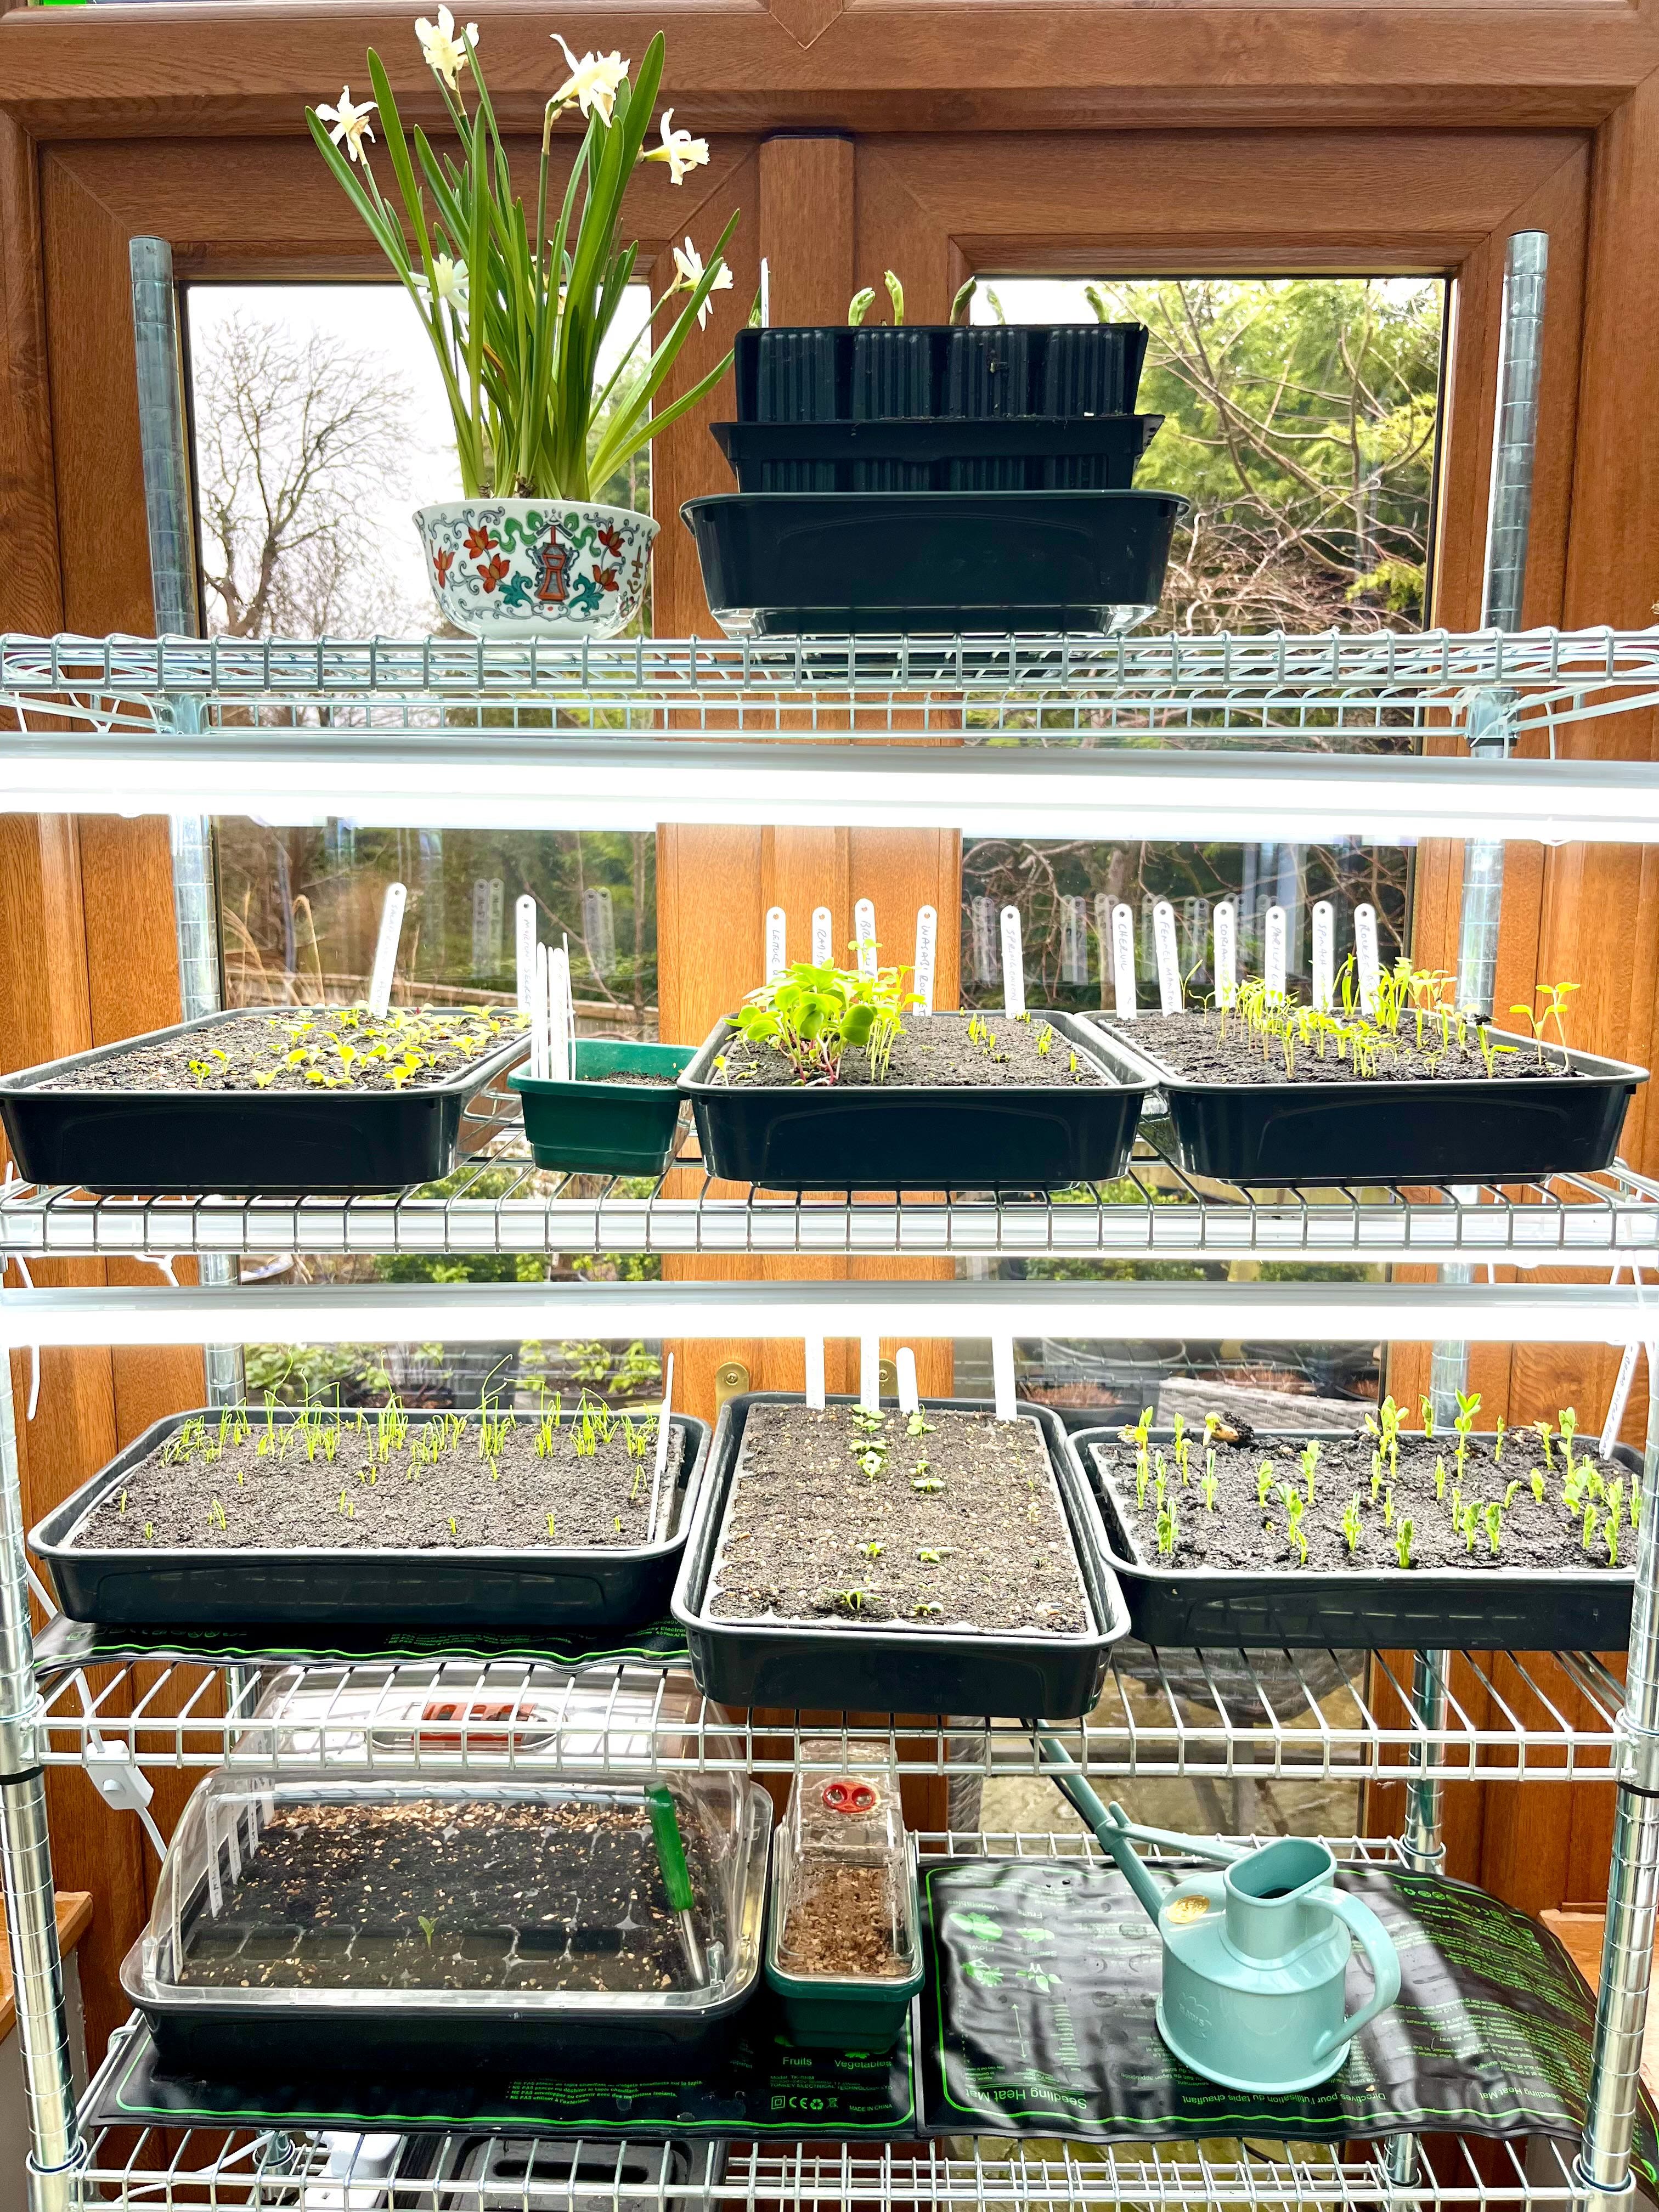
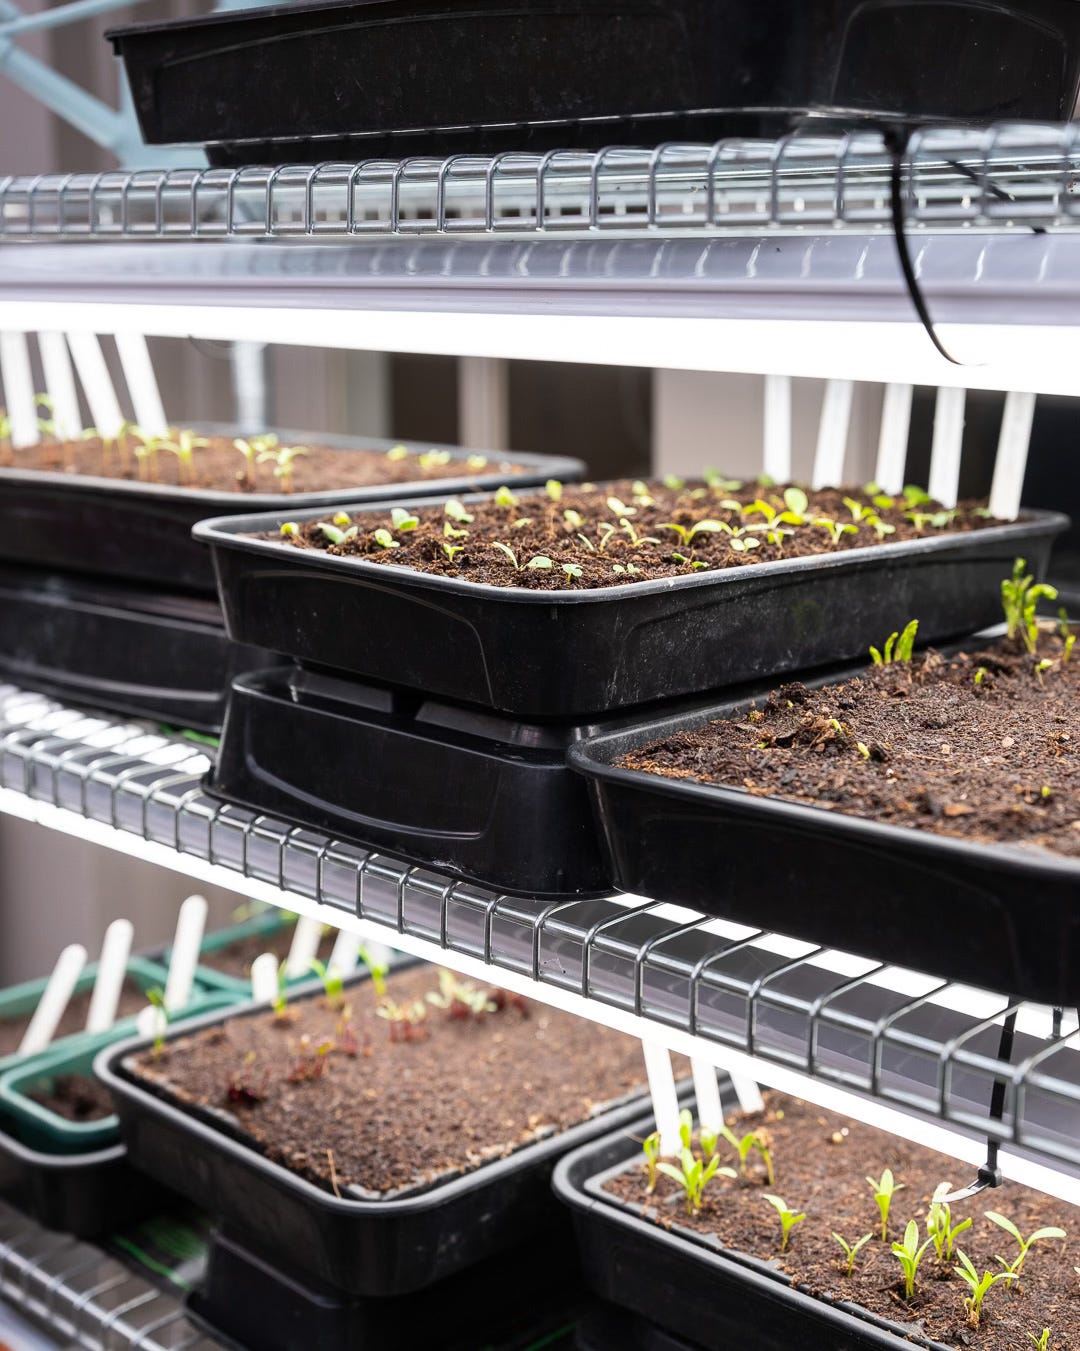
Simple… You go vertical, i.e. A rack. But, if like me, you struggle with enough natural light, then you need artificial lighting. You’ll need this for each shelf because every shelf will shade out the one below. So you need some form of ‘grow light’. Some seeds require extra warmth to germinate, so in this case, you need heat matts too.
These are the three main components to build my propagation station:
A galvanised metal rack. Mine is the OMAR rack from Ikea: https://www.ikea.com/gb/en/p/omar-1-shelf-section-s69829083/
Seedling heat mats similar to this: https://amzn.eu/d/8kY6i2Y
Artificial lighting. I have opted for LED batten lights like this: https://amzn.eu/d/cUqxKld
A quick word on lighting…
There are seemingly thousands of grow-light products out there. Amazon is awash with them and apparently they all have 5-star reviews…? Hmmmm, not suspicious at all! I get offered them every month on instagram, mainly from unknown distributors in India and China. No thanks. If you have a set of grow lights that you know works for you, please let me know in the comments!
Some grow-lights are well researched and science-based, producing the ‘industry leading’ full-spectrum light, by using various colours of LEDs. Then there are the budget ones that look pretty, but are tiny, underpowered, and once you realise you need one lamp PER TRAY, it becomes really very expensive!
I was caught in the quagmire of analysis paralysis, when I stumbled upon an instagram post by Marlston Farmgirl. Kim was creating an entire ‘grow room’ - racks upon racks of seedlings for her wonderful flower farm - and was trialling these simple LED office lights. The beauty is that they are just £70 for a pair, but they will cover an entire shelf. In fact, they are long enough and bright enough to light three standard trays. The ones I use have a longer span than my shelves so there aren’t any ‘dark’ zones.
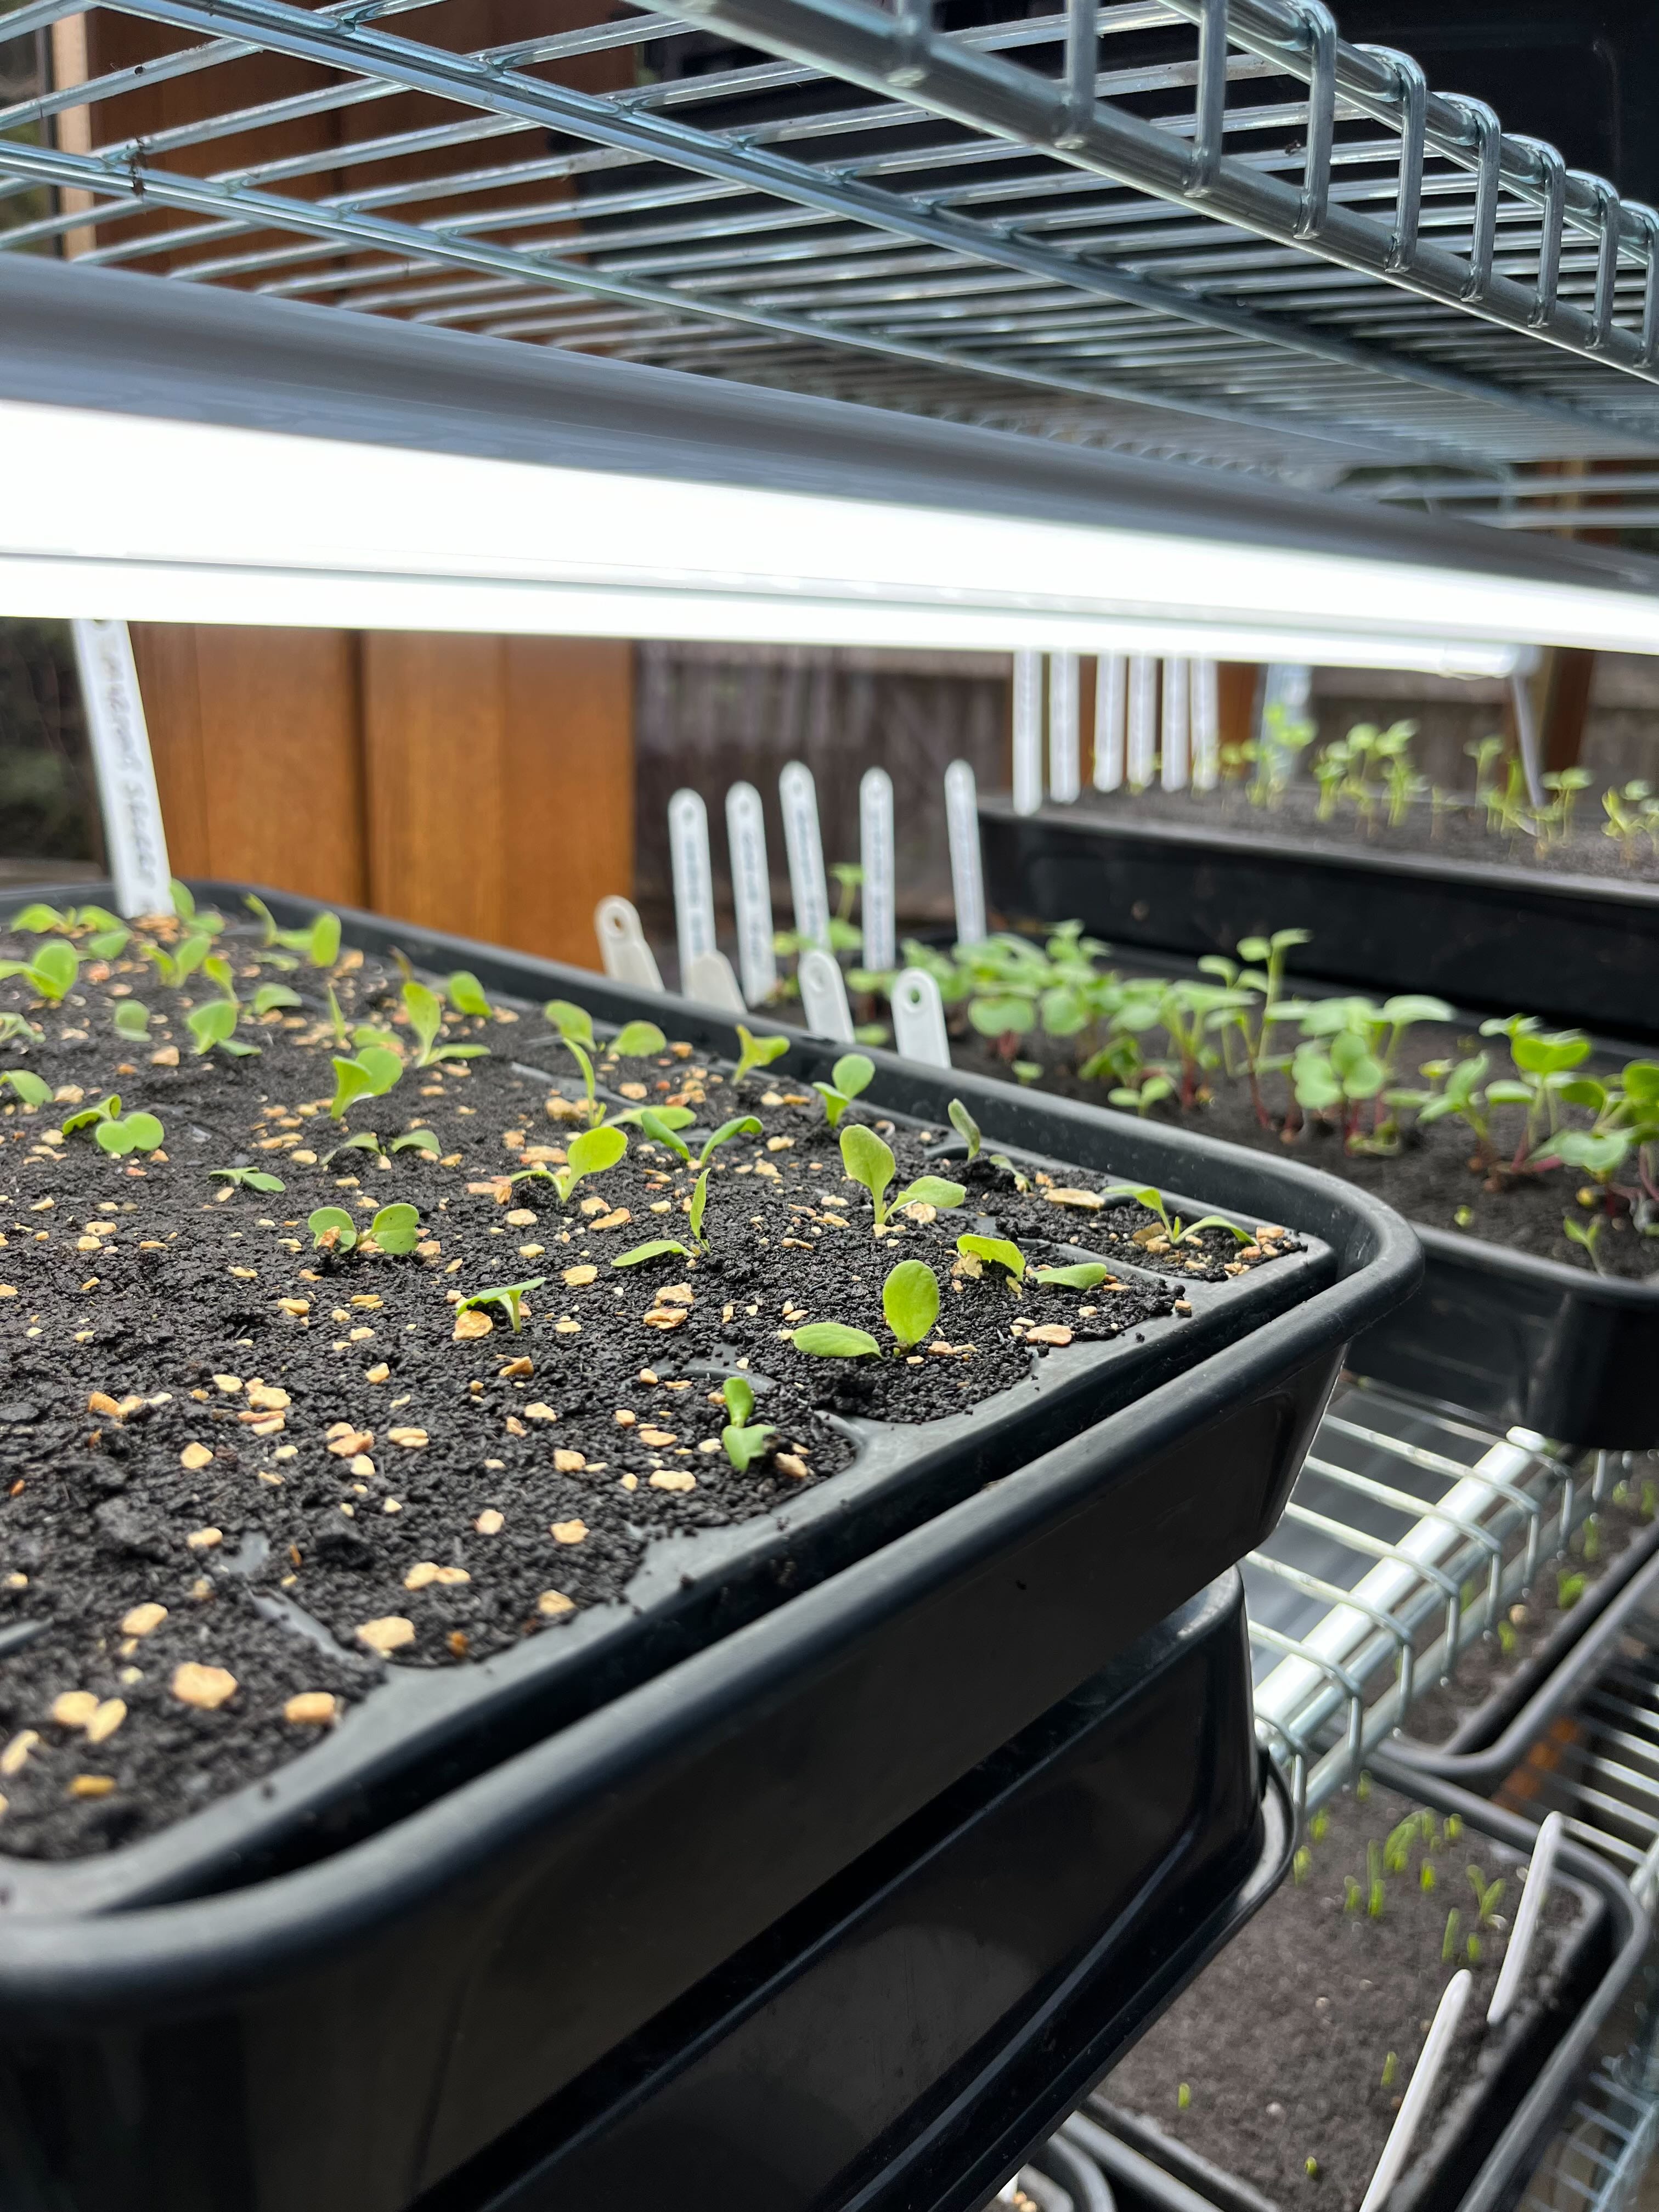
Sill feeling a little apprehensive, I tried them out… I was astounded! They worked! My seedlings had always looked a bit yellow and etiolated due to lack of light, but now they were stocky, robust, and really green! So it appears, form this gardener’s point of view, plants do not require those rather fancy ‘full spectrum’ gadgets after all. Especially when you’re just raising seedlings to be planted outside.
A quick word on heat mats…
Certain warmth-loving crops, like tomatoes, basil, cucumber, squash need extra heat for their seeds to germinate. Usually the compost needs to be over 18 ℃, ideally 20℃. With these thin electric mats, you simply unroll, plug into the mains, and then you lay your trays directly on top.
Although the mats are waterproof, I place my module trays inside a gravel tray, then lay this on the heat mat. It means roots protruding from the tray aren’t immediately cooked on the mat and that I can water safely, without water draining through and landing on the lights below. The mats run at about 17watts, so if you’re energy/cost conscious, please bear this in mind!
Marks. Get set… Sow!

Welcome to this seed sowing ‘special’. By the time you read this, my seed sowing will be underway. Hoorah! It’s an exciting time of year! My initial sowing date is the 14th February. Yes! Valentine’s…
A quick word on trays…
If you’ve read my ‘seed sowing post’ linked above, you will already know about my preference for module trays. But, for the new readers, I use CD60 module trays from ContainerWise. They were design by Charles Dowding and are fundamentally brilliant! You can read more on how I sow in that post.
All you need to know (right here) is that these trays slip inside standard-size (37cm 15in long) gravel trays and with standard propagation lids fitting over the top - if required. The main thing is safety. You don’t want to go splashing a watering can around with electric lights and sockets nearby! So, whatever you use, place your trays in something that will catch the overflow and drips, but thin enough to allow the warmth to radiate through. Stay safe!
A quick word on watering…
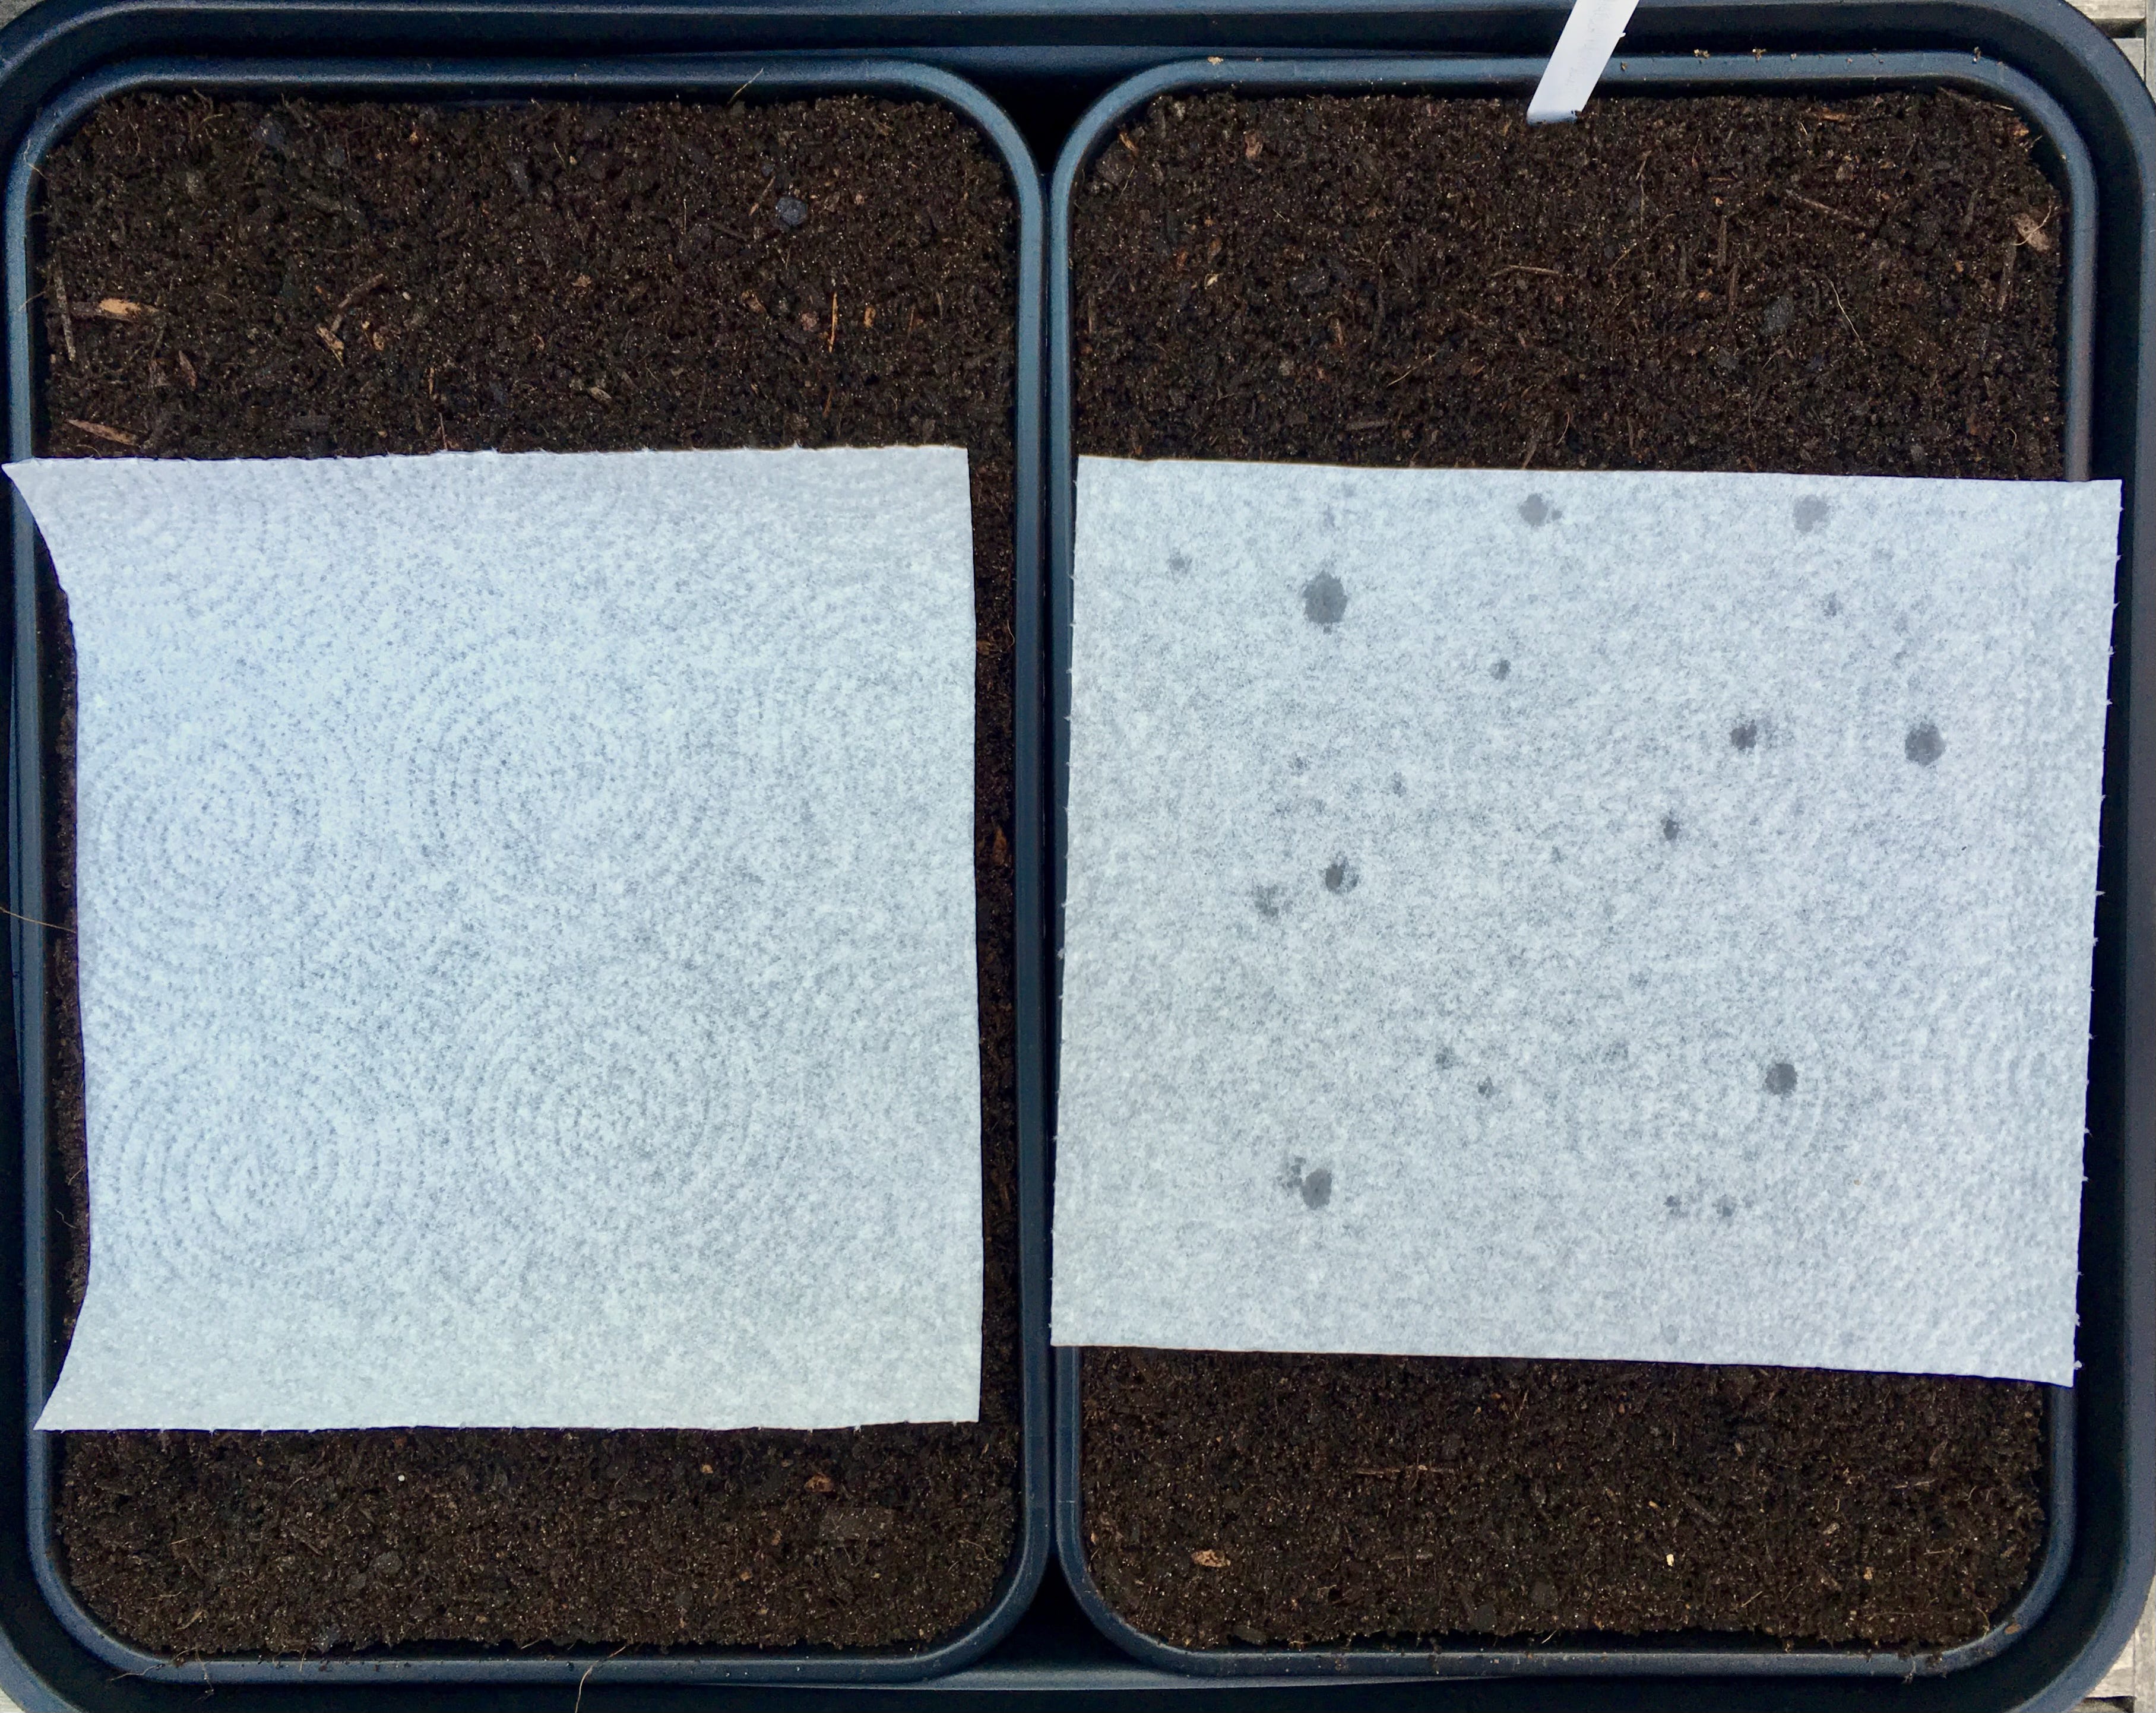
When I sow, I lay the finished tray in a larger tray filled with water. The compost in the seed tray then absorbs the water from beneath, via capillary action. This way, the compost is fully saturated, without the risk of disturbing the seeds on top, as you would with a heavy flow or heavy-handed accidental splash from a watering can. You can lay a sheet of kitchen towel on top to see (blotting) when the water as reached the compost surface.
Once on the rack, I water the trays with a small watering can, filling the gravel tray with water and again letting the compost soak it up. Or, I will take the trays off the rack and lay them in a larger tray of water. It’s only when the seedlings are matured that I use a regular watering can, fine rose, and water from above - trays taken outside and watered. TIP: Water your seedlings before planting out!
Building the station!
The rack is super simple to put together. There’s no need for instructions here. Just remember to level the rack and space out the shelves out evenly. You need enough room for a seed tray, seedlings to grow, and the batten lights to hang from above. For example, my shelves are spaced 30cm (12in) apart.
Next, it’s time to strap on some lights! These office lights can be simply daisy-chained with the easy plug-n-play mains leads. The lights are then plugged into an automatic timer to give me 14 hours of light per day, every day, without me having to keep going in and switching them on/off.
To suspend the batten lights, I use extra-long zip ties, but you could use twine, string, cord, etc. I chose the zip ties as they’re quick and less fiddly. I’m not exactly known for my buddha-like serenity with such things. At first install, I leave the zip ties loose, then gradually tighten them, hoisting the batten lights higher, as the seedlings grow.
If the light is too close to the leaves they can bleach and scorch. You also don’t want them so far away that the seedling stretch upwards for the light (etiolating). The suspended lights need to be adjustable. Alternatively, you could place something under the tray/mats to lift them up towards the light.
Next, I dedicate certain shelves for the warmth loving crops and flower seedlings. I use two heat mats, which practically covers the entire shelf. These plug into a separate 4-way extension cord from the lights, as these need to stay on 24hrs a day (while the seeds are germinating).
Once the seedlings have popped up with their seed leaves you can choose to switch off the heat, or keep it on for accelerated growth. It depends on the what you’re growing and the ambient temperature of your room. My conservatory can still dip to around 10 ℃ at night, so I keep them on until I am sure the seedlings are growing vigorously.
Tip: Seeds need warmth to germinate. Seedlings need light to grow!
By mid-April, my conservatory receives enough daylight that I can position trays on the top shelf of the rack and the window sills. The room is generally warm enough, day and night, to switch off the mats. By May, it’s effectively a baking greenhouse and all the doors and windows are wide-open all day.
The benefit
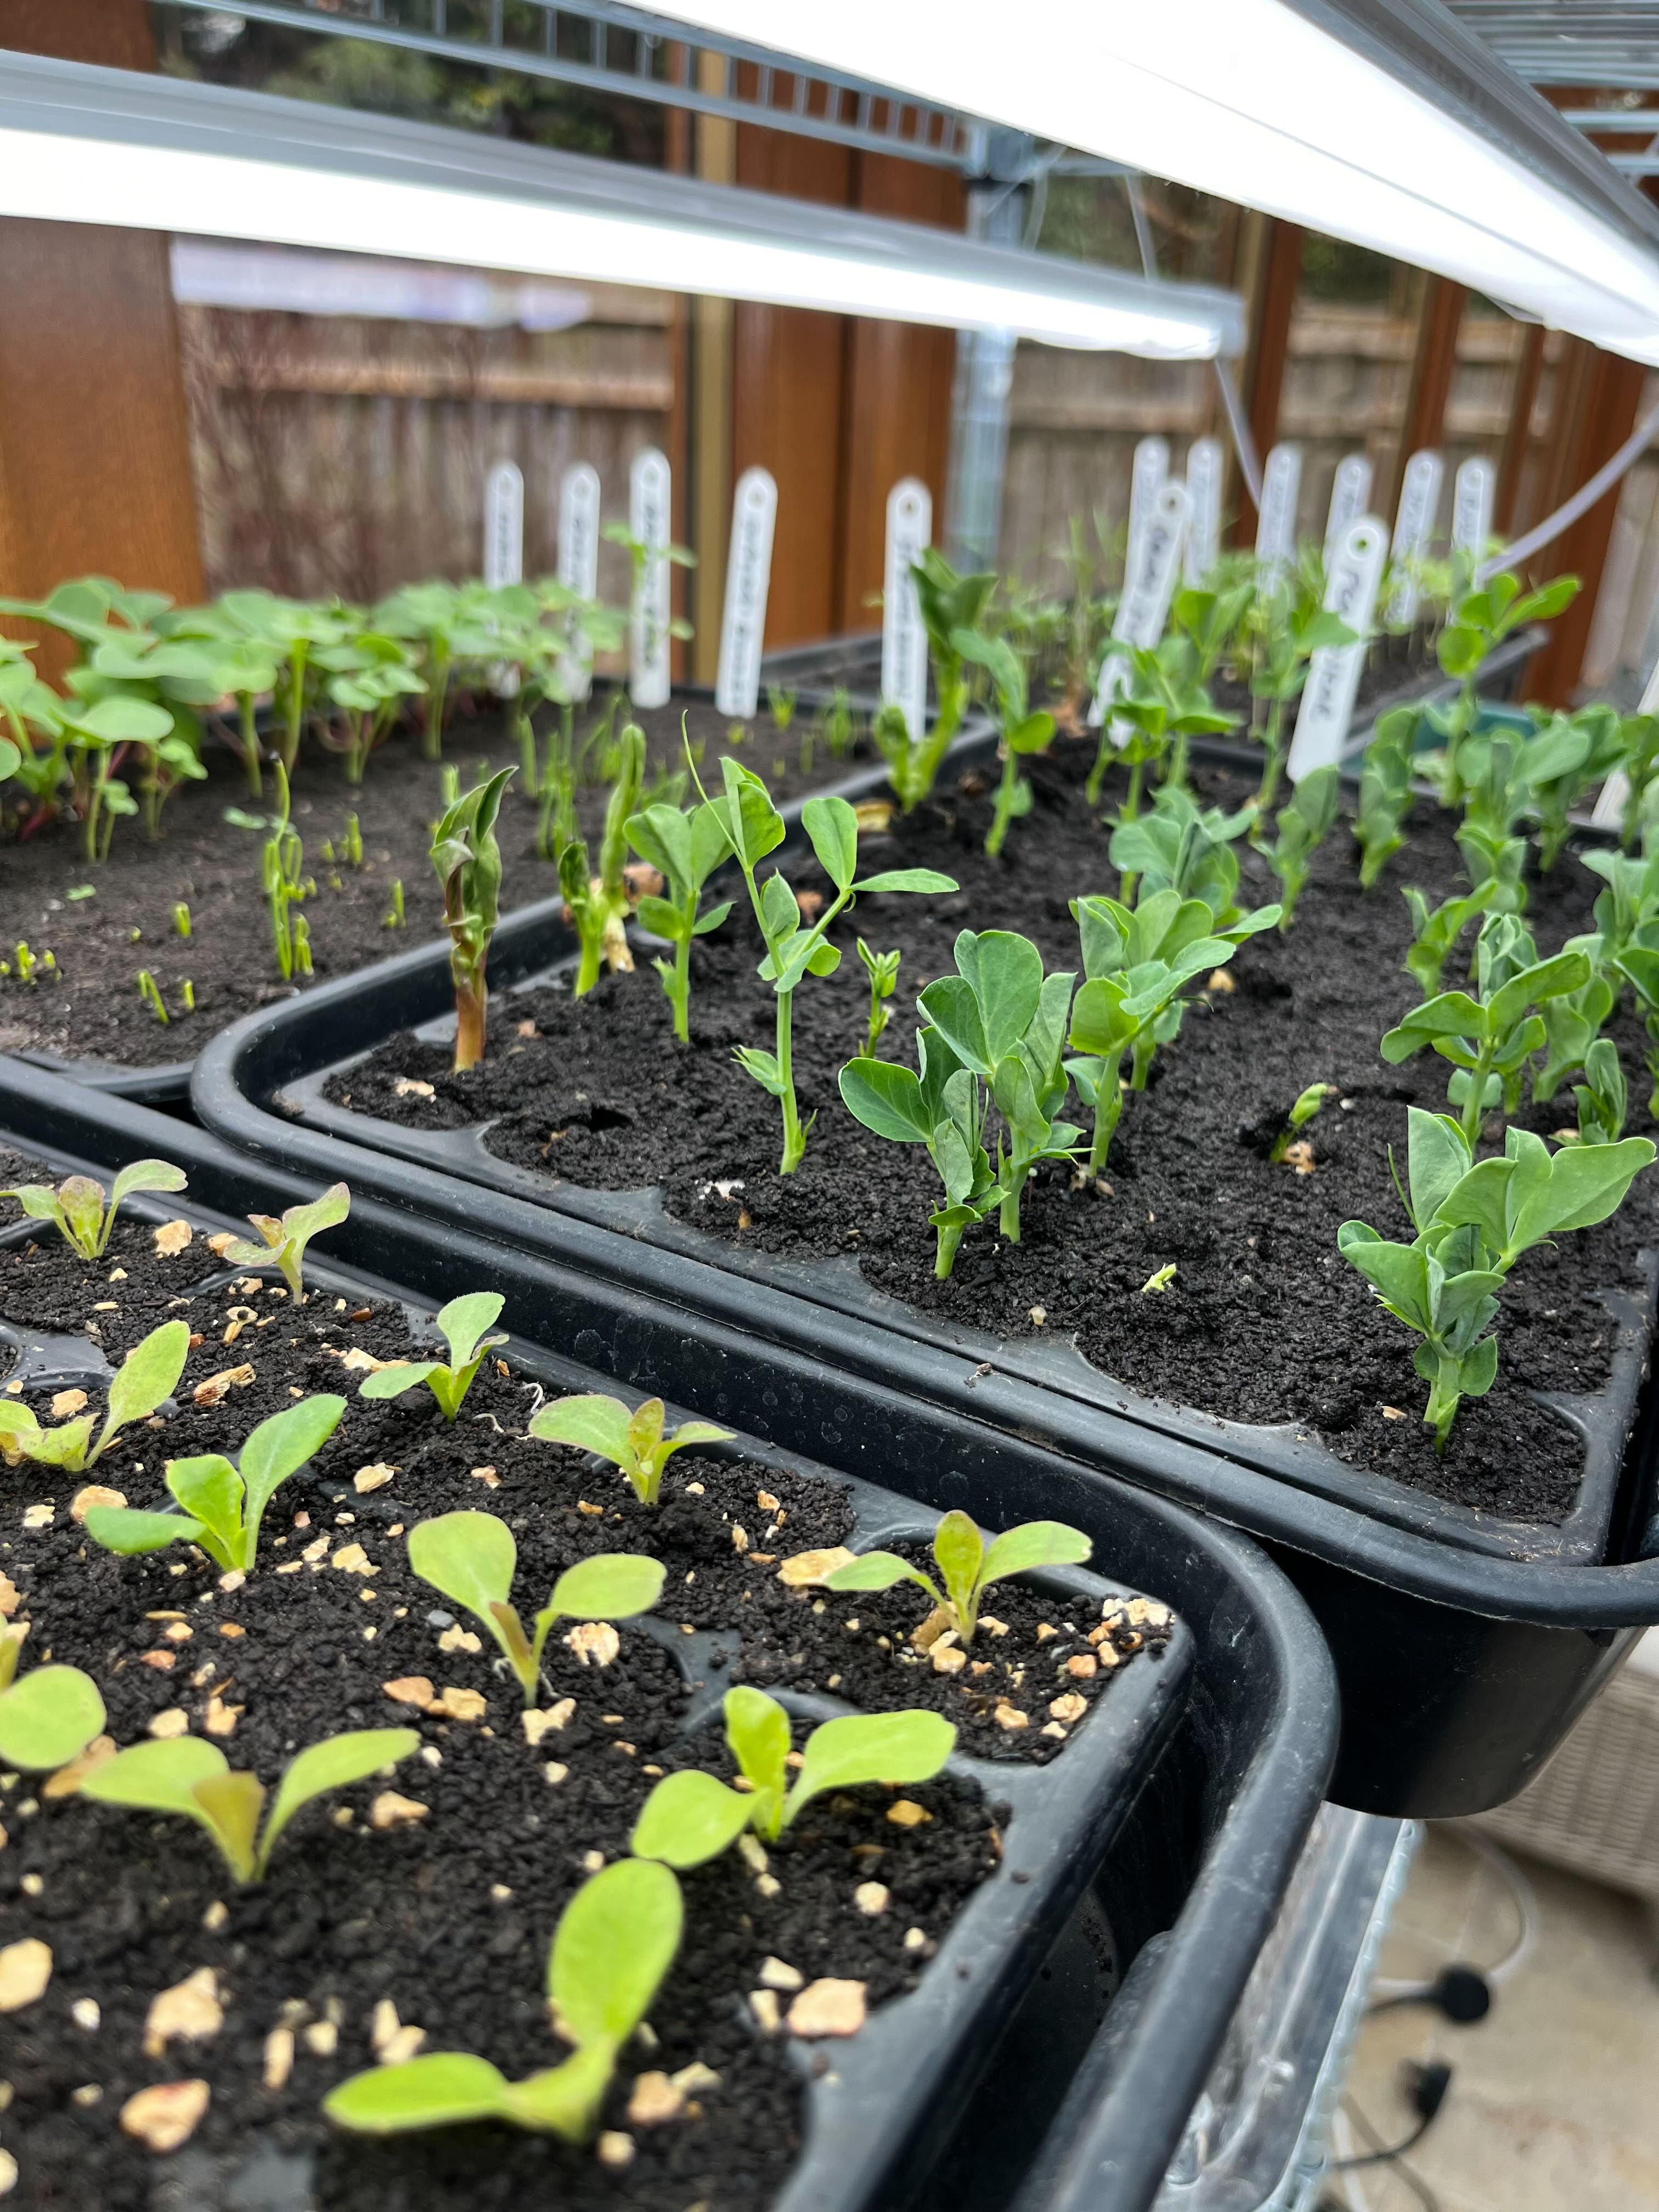
With this station, I gain more than a month’s growing time, even when the garden is in permanent shade and very frosty. This year, I sowed around 20th February and less than 5 weeks later I planted out my first frost-hardy crops. As I write this, I am picking my first salad crops. That’s sowing to harvest in under 9 weeks.
Planting out vigorous seedlings, then covering with a protective layer of horticultural fleece, gives them the very best start, a higher degree of success, and greater ability to fend off or survive pest attacks.
Coming up…
The spring edits! Over the past couple of weeks, I’ve been busy in the garden making changes to both the Courtyard, Cottage, and Flower gardens. I want to share with you the changes, the plants that have been moved, divided, or simply removed. Potentially, there’s a a guided video tour in the offering too.
Thank you this wonderful
information. I started seeds this spring and have a lot
to learn. ♥️
I enjoyed reading your last article Elliot….. but have decided at my great age…it is a darn sight easier and cheaper to buy some decent plug plants from my excellent local GC…or jumbo plugs from good old Sarah Raven…but thanks…