

Home Composting: Your Garden's Secret Superpower
What goes in, what comes out, and why every gardener should fall in love with rot. This is a hands-on, worm-filled journey into turning waste into wonder. Zero spreadsheets required.

The Case for Compost: Free, Fabulous, and Full of Life
Put simply, composting turns your garden and kitchen waste into a glorious, nutrient-rich fuel for your plants. Instead of sending green waste to the council, or worse, the landfill (you really shouldn’t), you can create a rich, dark material that feeds your soil, supports biodiversity, and improves soil structure and moisture retention.
Spread it over beds and borders as a mulch, or sieve it and mix with grit for your own potting compost. Homemade compost improves soil health in countless ways: adding organic matter, encouraging worms and microbes, and giving your plants that extra oomph. And it’s free! That’s always a bonus.
It’s not just about saving money or waste. Composting puts you at the heart of the natural cycle. You grow plants, they die back, you compost the remains, and the nutrients return to the soil. It’s a beautiful, regenerative loop that quietly supports every corner of the garden.
The best news? You can start composting any time. Truly, any time at all. However, late summer and autumn are particularly good with warmth and a steady supply of prunings and all that deadheading.
Whether you’ve got a country garden, allotment plot, or a cosy pocket-sized patch, there’s always room for a bin, a bay, or even just a heap.
Read on to learn how to make it work for you and why your garden will thank you for it. Spoiler: it involves less faff than assembling flat-pack furniture and is far more rewarding.
My Not-So-Glamorous, Gloriously Effective Compost Setup
With four compost bays on the go, I produce well over 3m³ (about 4yd³) of free, highly nutritious garden compost each year. That’s enough to mulch all the Kitchen Garden beds (27m²) with a generous 7cm (3in) layer, plus have enough left over for potting up spring bulbs, refreshing tired containers, and mixing up the occasional potting-on blend.
I also keep a separate bay, just for leafmould - the simplest compost going - and utterly magic for bulb mixes and woodland plants, hostas especially.
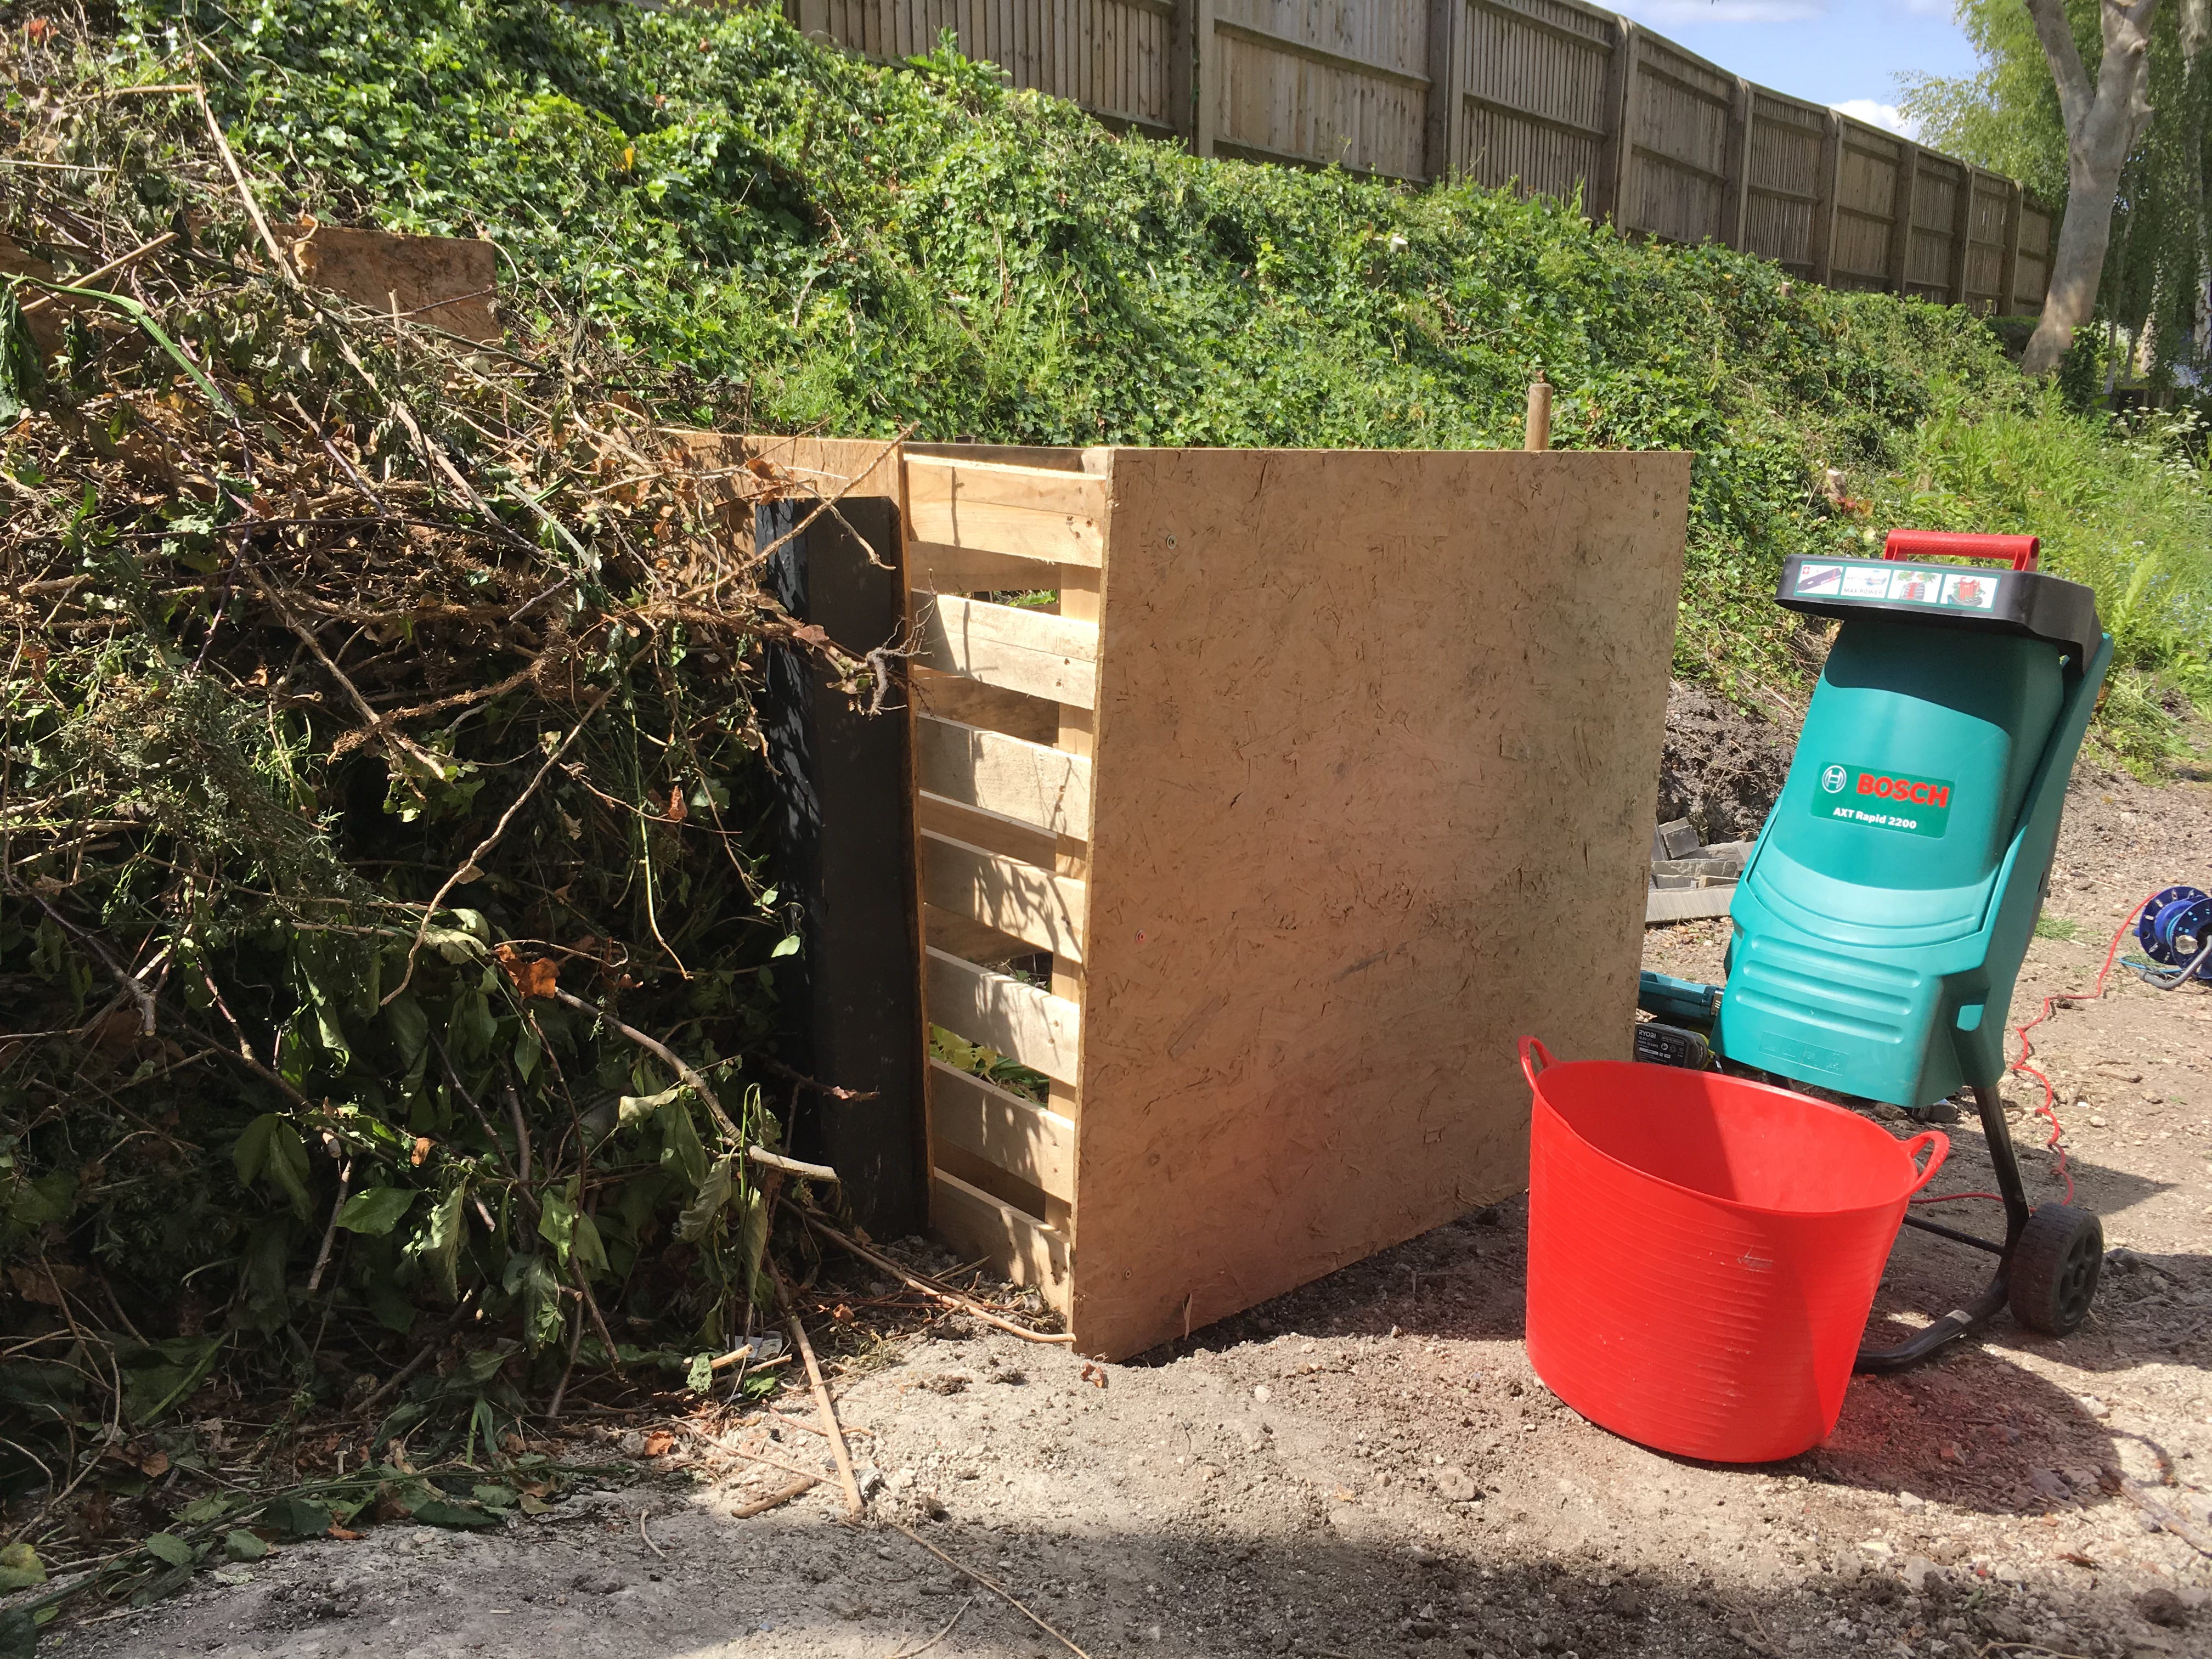
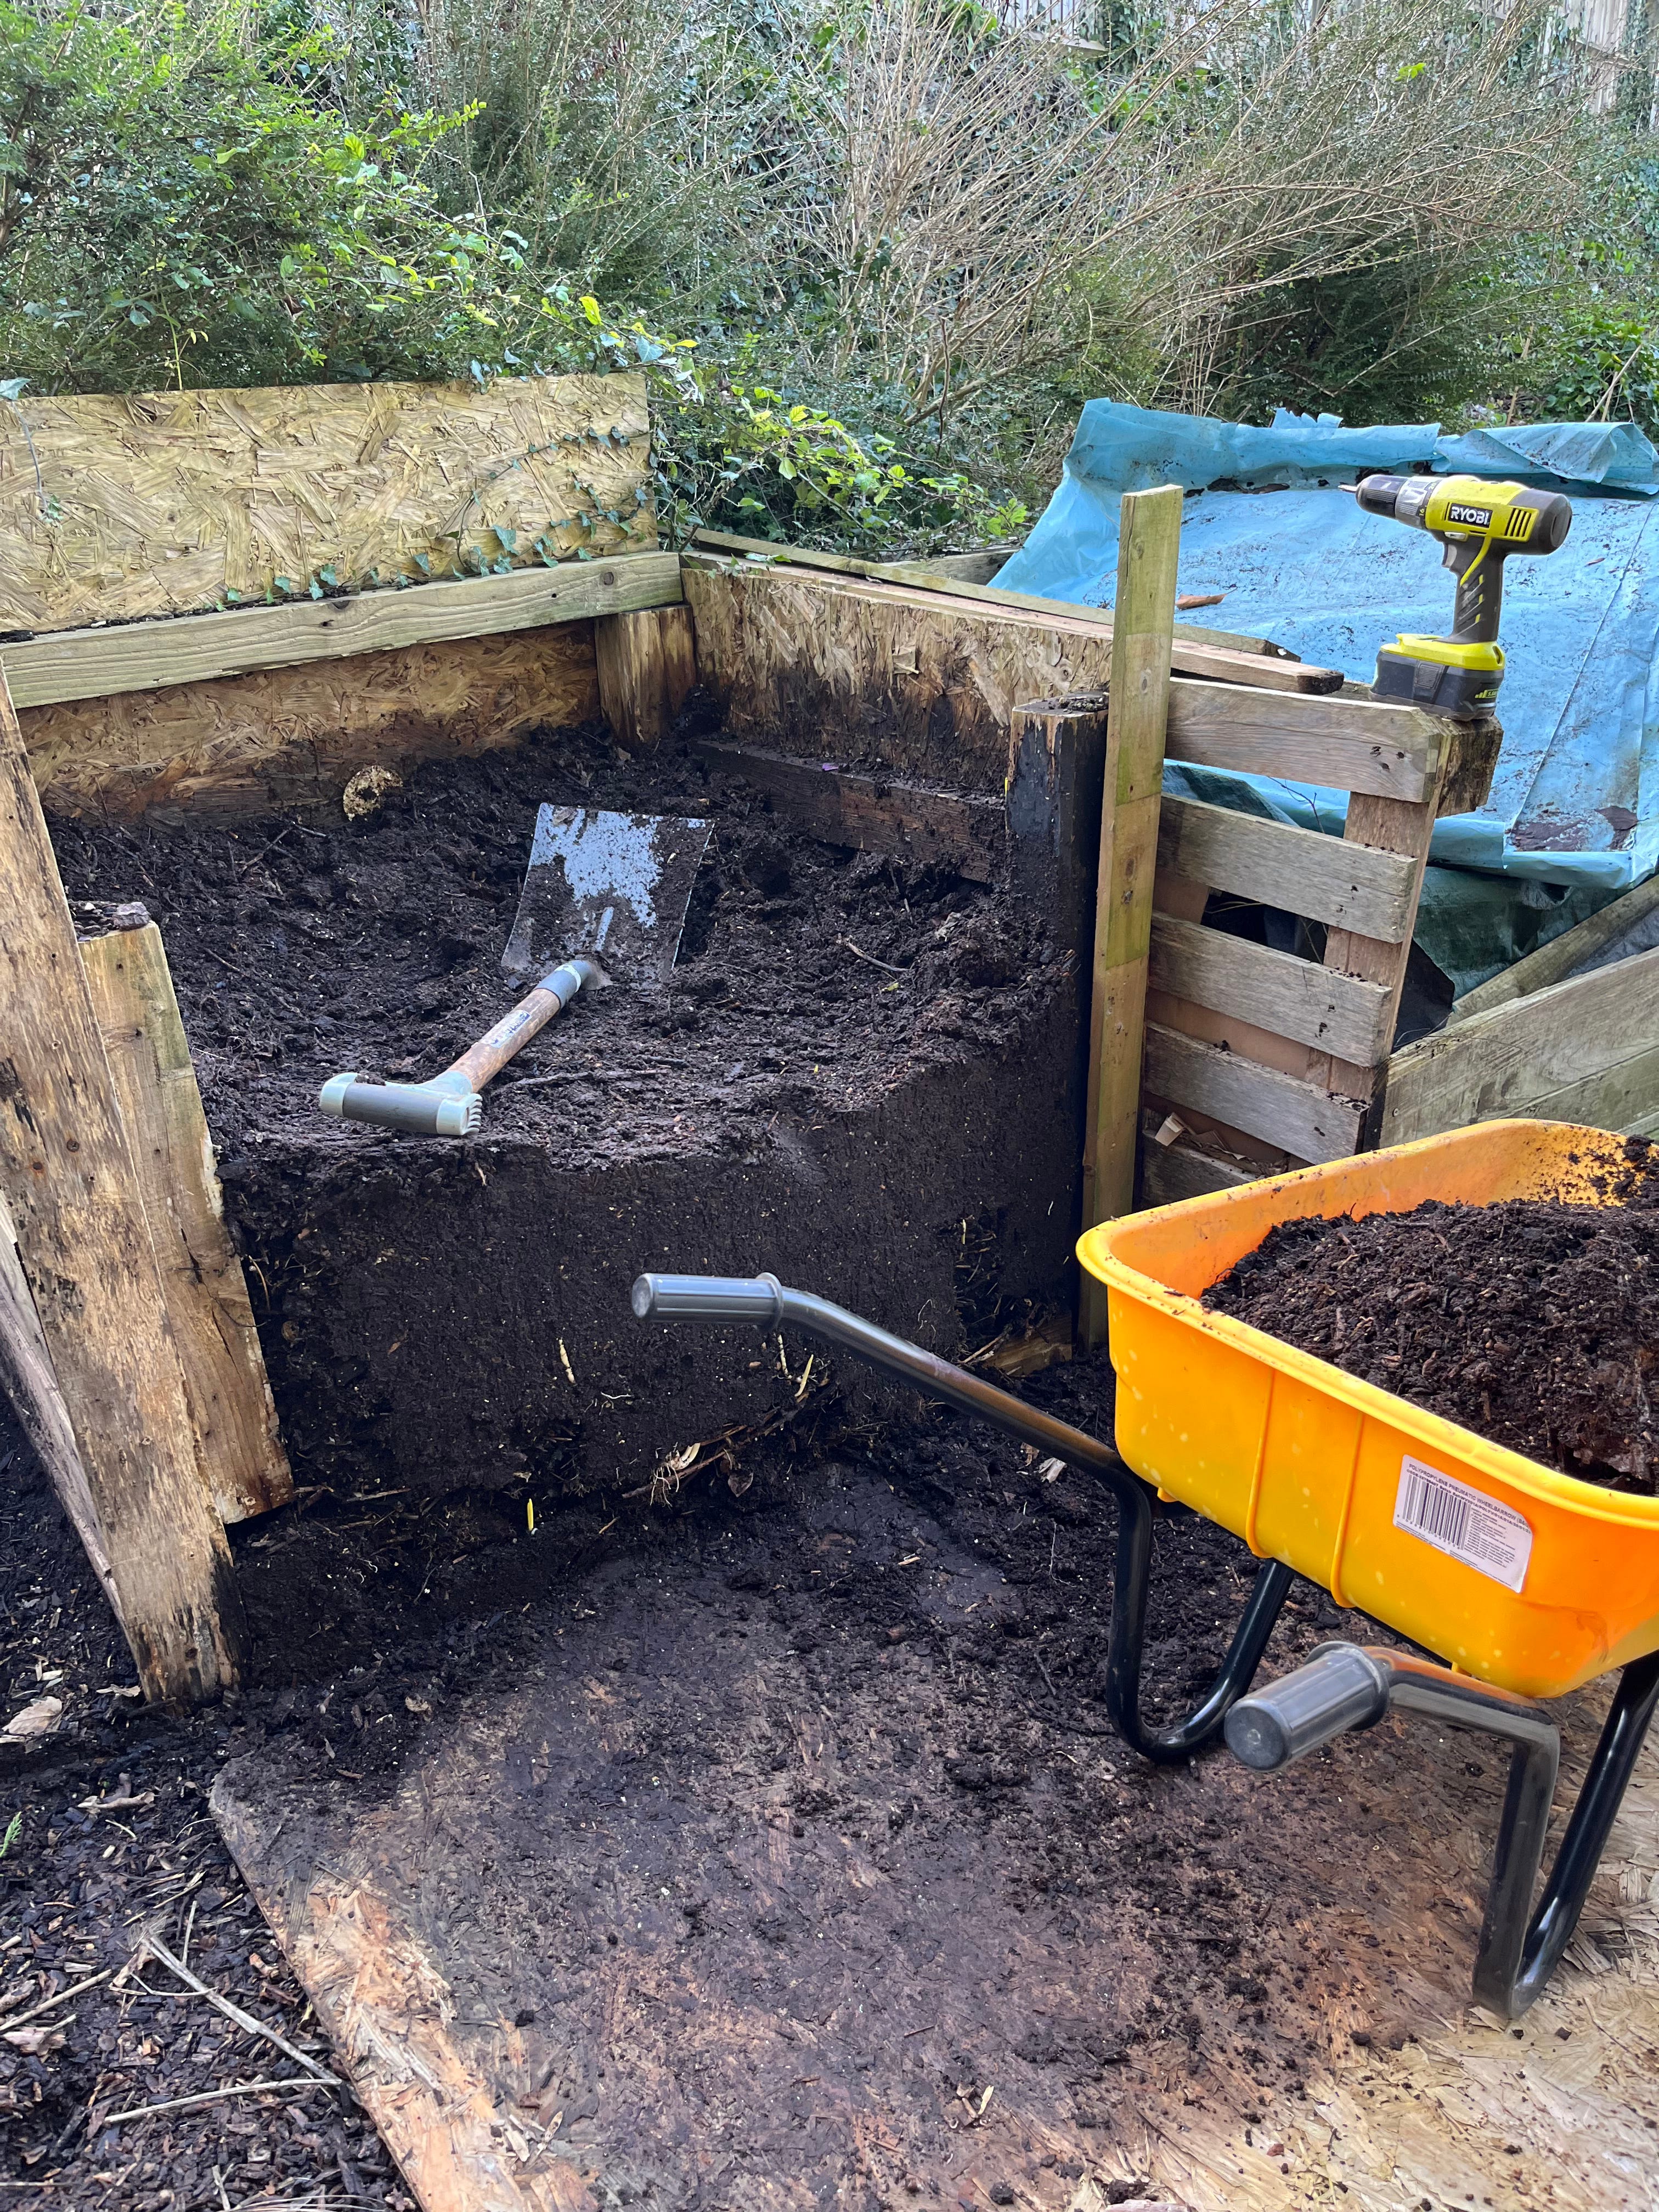
My own compost bays are made from salvaged pallets and offcuts. A few fence posts set with concrete, sides screwed or wired in place. They’re not pretty, but they’re free and they work. Each bay measures around 120cm x 120cm x 100cm and holds roughly 1.5m³ of material, a surprisingly generous volume once you start filling.
I line the inside with cardboard. It prevents materials falling out through gaps and helps hold in moisture and warmth - two important ingredients for good composting. And the cardboard slowly decomposes too, adding to the mix. Contrary to popular belief, you don’t need airflow from the outside; it just dries things out around the edges.
(If anything, you need airflow within and many compost aficionados set a tube or wide pipe in the middle that can be withdrawn, leaving a pocket of air right in the middle.)
You don’t need to copy my setup. Anything that holds a pile together will work. Wooden crates, corrugated metal, chicken wire, can all do the job. Don’t get stuck on perfection, the heap won’t judge you and neither will any respectable gardener. The important thing is to make a start. Progress is far better than perfect.
The Small-Space Solution: Composting Without a Bay
Plastic composters (like Darlecs, tumblers or hot bins) are handy if space is tight. They're widely available and start from around £30. They offer a neat, compact option, ideal for smaller gardens, patios, or balconies.
Personally, I find them a bit awkward, hard to turn (apart rom the tumbler of course, duh), it’s difficult to tell what’s going on inside, and they’re a faff to empty. If you do use a darlec type composter, I can highly recommend lifting off the whole bin periodically to turn the contents on a tarp, then refilling. You get a better mix and a good look at what’s happening.
If you’ve got the space, a pallet bay wins hands down. It’s easier to use, produces more compost, and lets you see and manage the heap properly.
Out of Sight, Not Out of Reach: Finding the Right Spot
Ideally, your compost area should be in a shady, out-of-the-way spot. Somewhere the temperature stays relatively stable and the pile doesn’t dry out too fast. But life (and gardens) aren’t always ideal. My compost bays are in full summer sun and it’s absolutely fine.
I simply cover the heaps with cardboard, chipboard, or a tarp. Covers help prevent excess rain turning the heap into a soggy stinking mess, while retaining the natural moisture and warmth from all that lush green material. They also help moderate temperature swings, especially during colder nights.
Tip: Do try and find a spot where the heap can be in direct contact with the soil, to draw-up all those lovely microbes and bugs.
Hot Heap 101: The Sweet Spot for Steamy Success
If your heap is around 1m³ and filled within about 8-10 weeks, it should heat up nicely, often exceeding 60°C at times. Temperatures of 55–65°C (131–149°F) sustained for several days are generally enough to kill fungal spores, most pathogens, and weed seeds. Much hotter, and you risk killing off beneficial microbes and fungi. The sweet spot seems to be around 40-60°C.
A compost thermometer is well worth having. It’s oddly satisfying watching the temperature spike after adding green materials like (untreated) grass clippings. Over time, the heat will tail off and stabilise, before eventually cooling completely as the compost matures. You’ll start to get a feel for how it behaves. It’s a little like sourdough, but with a stronger whiff of nature.
Even if your heap doesn’t get super-hot, don’t worry. Slow compost is still good compost. In the end, it’s not about speed. It’s about transformation. And let’s face it, any process that turns last week’s salad into beautifully dark, crumbly, nutrient dense compost deserves a bit of awe.
The Quiet Heap: Winter Composting Without the Drama
Slower, yes, but absolutely worthwhile. With more carbon-rich "brown" materials and far less ambient heat, winter composting is a gentler, more fungal-driven process than its steamy summer counterpart. It might take its time, but give it a year and even the dullest twig turns into black gold. Slow gardening at its finest.
Winter heaps can take 10–12 months to mature (sometimes longer if it’s especially cold and dry), but the end result is a thing of beauty… dark, earthy, woodland-scented compost that crumbles like chocolate cake. And because there’s less pressure to rush it, winter is the perfect time to experiment, observe, and let the heap work its quiet magic.
You can speed things up by shredding or chipping your browns, anything that breaks down size and adds surface area helps. Even just piling the material on a path and running over it with the mower will do the job. Some of the best compost I’ve ever made came from mowing up bark-chip garden paths, tipping the pulverised mix into a bay, and leaving it alone for a year.
The result? Absolutely incredible.
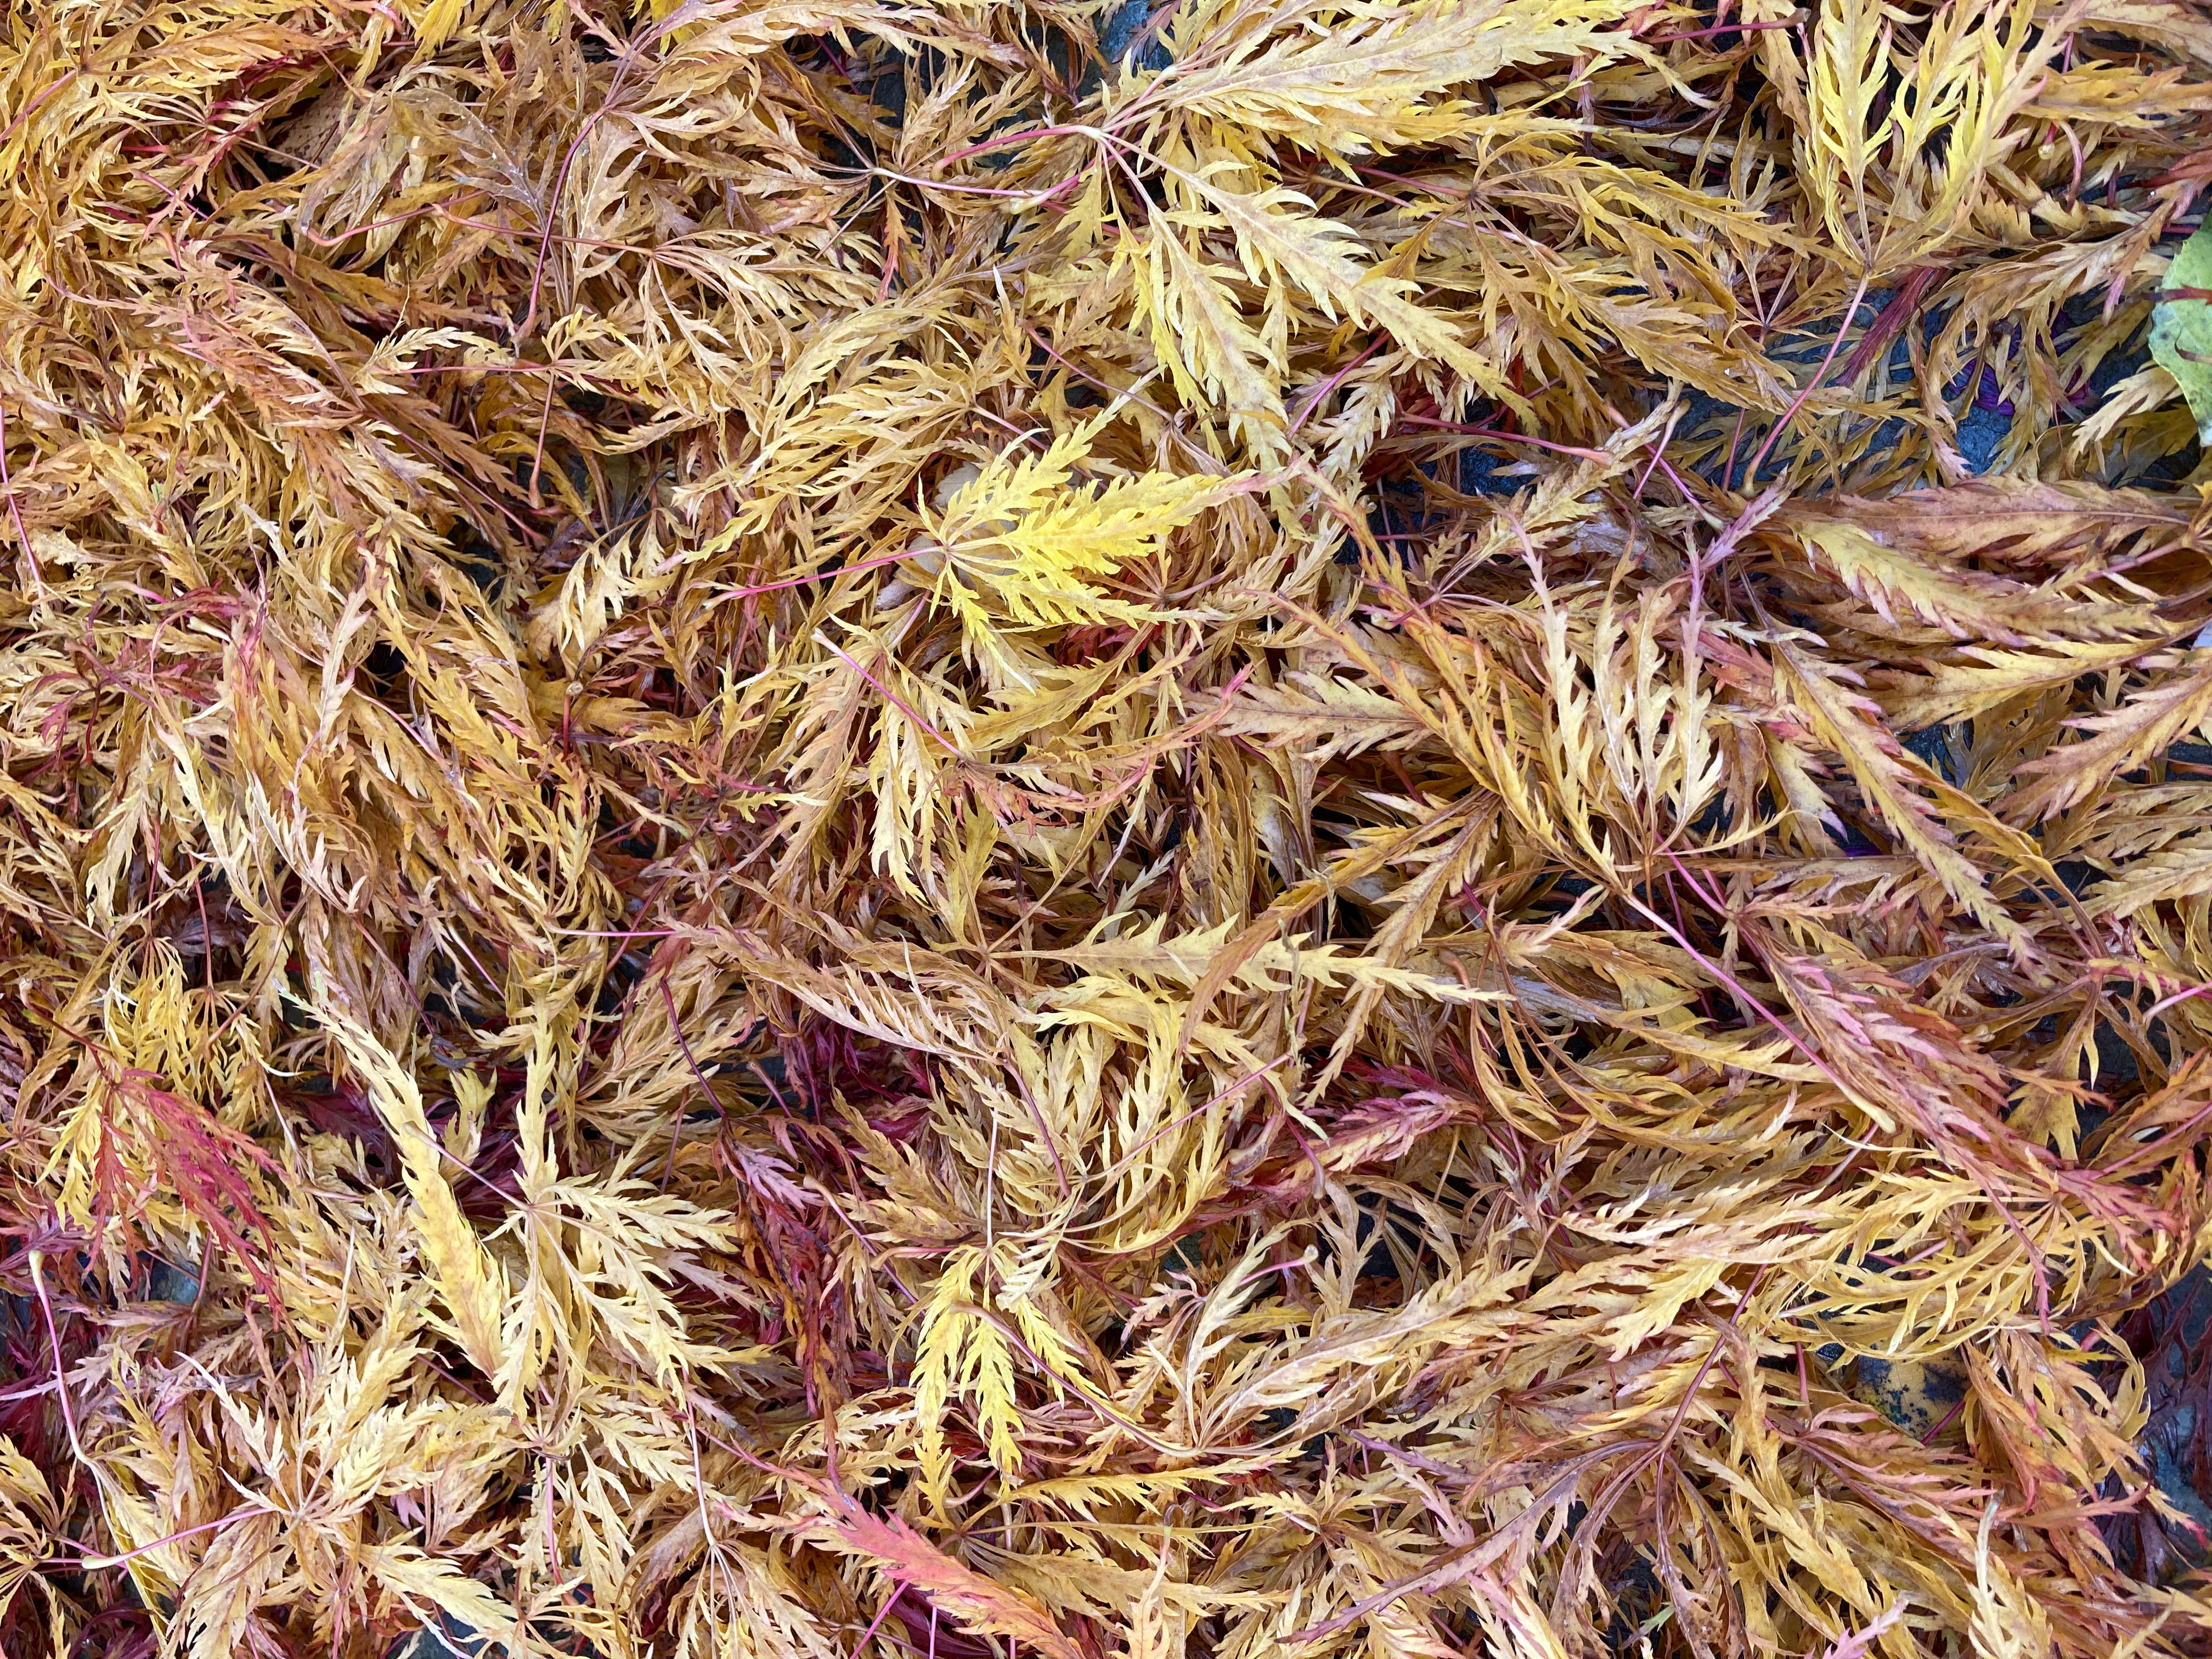
Leafmould: The Bonus Round
If you have trees nearby, leafmould is pure gold. I collect leaves from the garden, the lane, and even the neighbours’ gardens (with their blessing!). They all go into a dedicated bay with no turning and no faffing. Just pile them up and leave them. In a year or two, you’ll have a crumbly, sweet-smelling mulch beloved by bulbs and woodland plants.
I only collect from paths, lawns, and hardstanding areas, leaving the rest as a natural mulch in the borders. It saves time, looks natural, and keeps the local insect population happy. I no longer mow the leaves either. Many caterpillars and other wildlife overwinter in the leaf fall, so I now add them whole.
This is a purely fungal process, so there’s no warmth generated, even when the leaves are wet. So, it’s safe to load up the leaves, without having to pick through for caterpillars. It really is just like an extra thick layer of fallen leaves. Leafmould isn’t rich in nutrients like compost, but it’s brilliant for improving soil structure and locking in moisture.
Avoiding The Dreaded Slime
Slimy, smelly compost is simply too wet and lacking in air, i.e. it’s gone anaerobic. Usually, this means there’s too much green material (too much nitrogen), like grass clippings, not enough air, and not enough brown: dried stems, twiggy bits, roots, cardboard, and the like.
The answer? Balance. Aim for roughly 50/50 or 60/40 green to brown. No need to be scientific about it. This isn’t Bake Off.
Just remember: moisture levels and the availability of ingredients will fluctuate throughout the year. That’s normal. Keep a stash of browns collected over winter (cardboard, dried stems, wood chip) so you’re ready to balance out the lush green stuff when summer comes charging in.
The rule of thumb? Every time you add something green and juicy, toss in a layer of something dry and brown. It’s the compost equivalent of dabbing up a kitchen spill with a tea towel - quick, practical, definitely worth doing.
And if it starts to whiff like boiled cabbage and egg, then you’ve got too much nitrogen. Chuck in some cardboard, give it a good turn with a fork, and let it breathe. It’ll sort itself out… eventually. Heaps are resilient like that.
No-Faff Composting: Layers, Lumps, and Letting Go
Layering in material works perfectly well: a trug of green, a sprinkle of brown, repeat. Shredding speeds things up, but whole plants and cardboard break down just fine over time. When I remove the front boards of my bays, the top layers are visible, but below that, it’s all rich, uniform compost.
There’s no need to stir it every week either. That just sounds like self-induced purgatory to me. No need for spreadsheets or ratios and complex reasoning. Just feed it a balanced diet and give it a turn... but how many times?
Turning and Moisture
Turning once is enough to mix the contents and boost airflow. Yes. Just once. We don’t have the time and manpower of Monty Don and his gardeners to turn heaps successionally, from one bay to the next. If using a plastic bin, empty it onto a tarp, mix with a fork, and reload.
When turning the material, take a quick check of the moisture levels: squeeze a handful, if it’s bone dry, add a spray of water as you go. If it's wet and slimy, add more browns and really shake out the claggy bit.
Moisture should be like a wrung-out sponge. Too dry, and the process slows to a crawl. Too wet, and it all gets sloppy and sour. Get the balance right, and everything clicks into place.
What Can Go In?
Greens:
Fruit and veg scraps
Tea bags and coffee grounds
Weeds and roots (yes, even bindweed and ground elder)
Grass clippings (untreated!)
Stems, leafy prunings and deadheads
Browns:
Cardboard (brown, unlaminated, tape removed)
Toilet roll tubes
Wood chips and twigs
Spent compost
Wood ash (from untreated wood)
Tips:
Bury kitchen waste to deter pests.
NO NOT add meat, dairy, any cooked food—it attracts vermin.
If you’re adding compost to vegetable growing areas, do not add any material treated with pesticides, herbicides, actually anything that ends with *cide.
Don't worry about weed roots or disease. A hot summer heap will kill them.
Keep a bucket or trug by the back door to collect peelings and scraps and build the routine into your daily life.
Cooked to Perfection? Signs Your Compost Is Done
It’s done when it’s dark, crumbly, and smells like autumn woodland. If it’s cool, not slimy, but full of worms and insects, you’re there. It might still have woody bits and that’s fine. Use chunky compost as mulch. If you’re after a compost worthy of potting and seed sowing, then it can be sieved.
There is no single day when it turns from mess to magic. It’s a slow, beautiful shift, and one day you’ll lift the cover and simply smile.
If you only need compost once a year, as I do, you don’t need to rush it. Let the heap do its thing. But if you need a regular supply, or you’re naturally impatient, you can always Google “fast compost”, where an eager bunch of creative compost makers will regale you with anecdotes of super-ingredients, activators, and weekly turnings.
Final Thoughts
So, there you have it. A heap of garden waste, a bit of patience, and boom! Black gold. Honestly, if composting were any more rewarding, I’d have to write it a thank-you card. I might just do that anyway.
You don’t need fancy kit, thermometers, or a degree in soil science. Just a good mix of green and brown, a fork, and the willingness to poke a heap now and then. It’s gardening alchemy, just with fewer explosions.
And remember… every banana peel, every grass clipping, every cardboard box is just waiting for its moment to shine. Let it rot, and watch your garden bloom.
As always, thank you for reading. If you’ve a moment, please leave a heart or a note below. I do love hearing your thoughts so feel free to ask questions and comment. It all helps more gardeners find their way here.
I have a small garden, mostly lawn (☹️ - wife’s orders) and I guess it’ll take at least a year to fill the plastic ‘podium/carrier’ that I’ve repurposed from the garage. I’m worried that it won’t get hot enough to kill weeds, which would be a large proportion of what would otherwise go into it. Thoughts?
PS Really useful article. Love your style of writing. Just retired and on a tight budget but pondering subscribing…..
Ahhhh the goodies the critters will find in our compost heap!